Clay has been a favorite material for artists and hobbyists for centuries. It’s affordable, easy to work with, and lets you create beautiful objects with your own hands.
Working with clay can be incredibly relaxing. It also gives you a creative outlet to express yourself in ways that feel natural and fun.
This clay project guide offers plenty of different ideas that work for everyone. Beginners will find simple projects to build confidence and skills. More experienced crafters can try complex designs that challenge their abilities.
Each project includes clear steps to help you succeed. You’ll find ideas for home décor, gifts, jewelry, and functional items that you can actually use.
Pick a clay project that excites you and start creating today. Your hands are already ready.
Simple Clay Projects for Beginners
Starting with clay can feel intimidating, but these projects make it easy. You don’t need special tools or years of experience. Just grab some air-dry clay or polymer clay and follow along.
These beginner projects teach you basic techniques. You’ll learn how to roll, shape, and smooth clay properly. Each one builds your confidence for more complex work later.
1. DIY Clay Coasters
Clay coasters protect your furniture and look great on any table. They’re one of the easiest projects to start with.
What you need: Air-dry clay, rolling pin, round cookie cutter, sandpaper, and sealant.
Roll your clay flat to about half an inch thick. Use a cookie cutter to cut perfect circles. Smooth the edges with your fingers or a damp sponge.
Let them dry completely for 24 hours. Sand any rough spots gently. Apply a waterproof sealant to protect them from moisture and stains.
You can paint designs on top or leave them natural. Make a set of four to six coasters at once.
Pro Tip: Add cork backing to prevent scratching your tables.
2. Handcrafted Clay Earrings
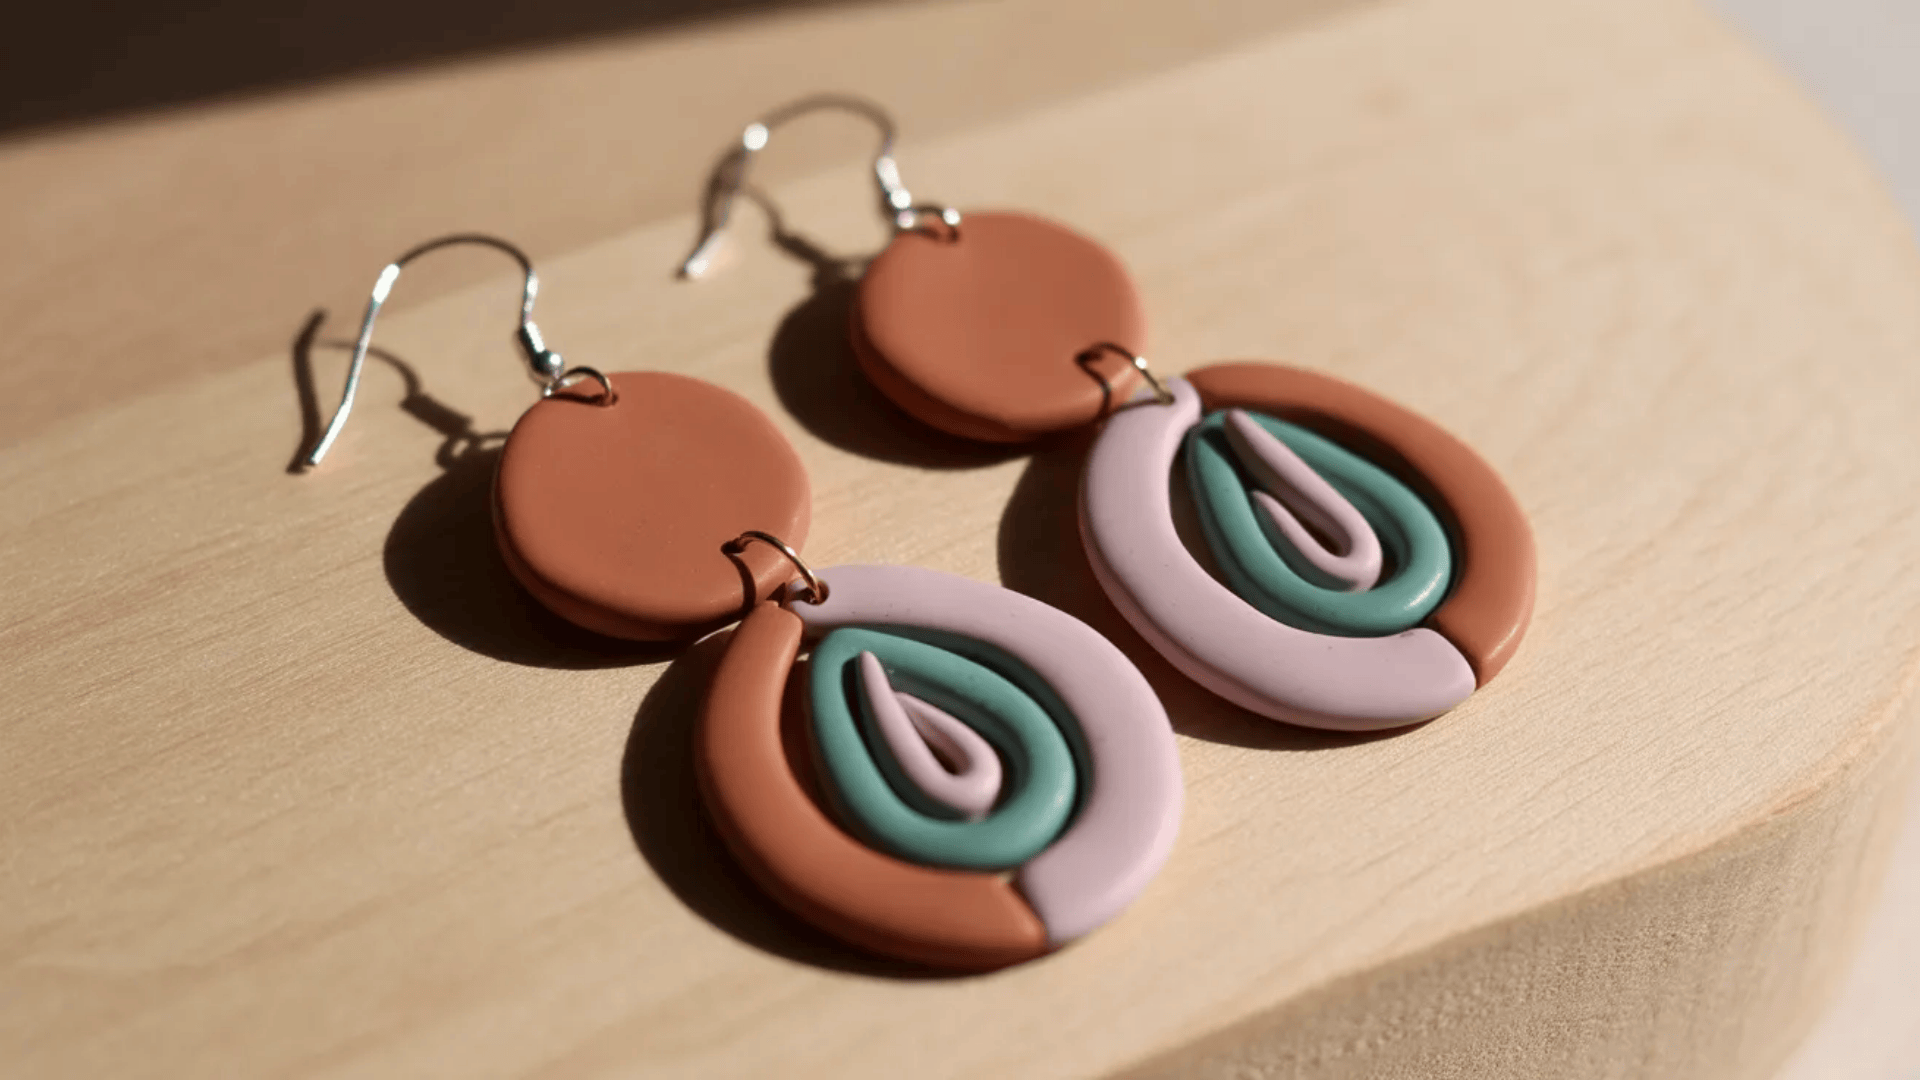
Clay earrings are lightweight and let you create any design you want. They’re perfect for beginners who want to make wearable art.
What you need: Polymer clay, earring hooks, a small straw or toothpick, an oven, and jump rings.
Roll small pieces of clay into your desired shape. Circles, teardrops, and rectangles work well. Keep them thin so they’re light on your ears.
Use a toothpick to poke a small hole at the top. This is where you’ll attach the earring hook later.
Bake according to package directions (usually 275°F for 15 minutes). Let them cool completely. Attach jump rings and earring hooks through the holes.
Paint or leave them solid colored. You can also mix clay colors before shaping for a marbled look.
Pro Tip: Make two at once and measure them against each other to ensure matching pairs.
3. Clay Magnets
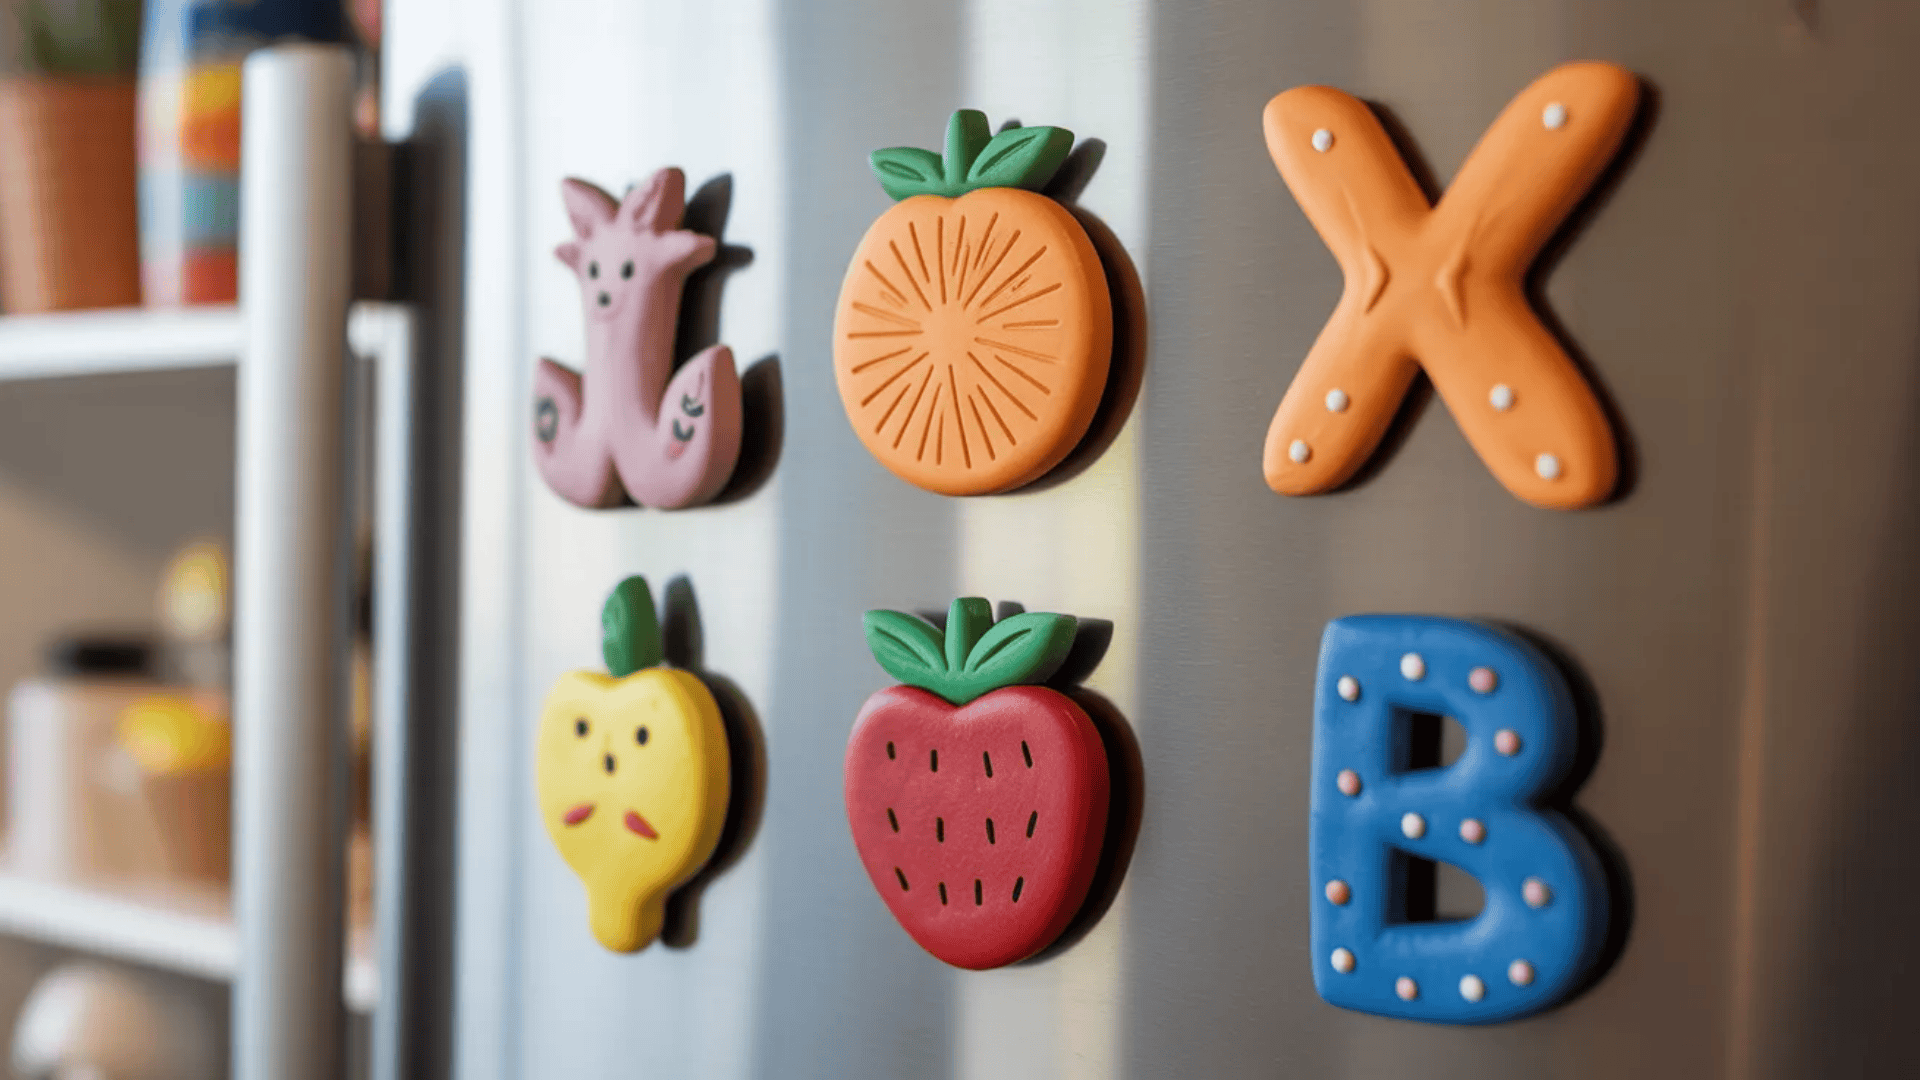
Fridge magnets made from clay add personality to your kitchen. They’re quick to make and fun to customize.
What you need: Air-dry or polymer clay, small magnets, strong glue, and paint.
Shape your clay into fun designs. Animals, fruits, letters, and shapes all work well. Keep them small and flat on one side.
Let air-dry clay sit for 24 hours. Bake polymer clay following package instructions. Once fully dry and cool, glue a small magnet to the flat back. Use strong craft glue or hot glue for best results.
Paint details with acrylic paint if desired. Seal with clear coating for durability.
Pro Tip: Create magnets that spell out names or meaningful words for personalized gifts.
4. Mini Clay Pots
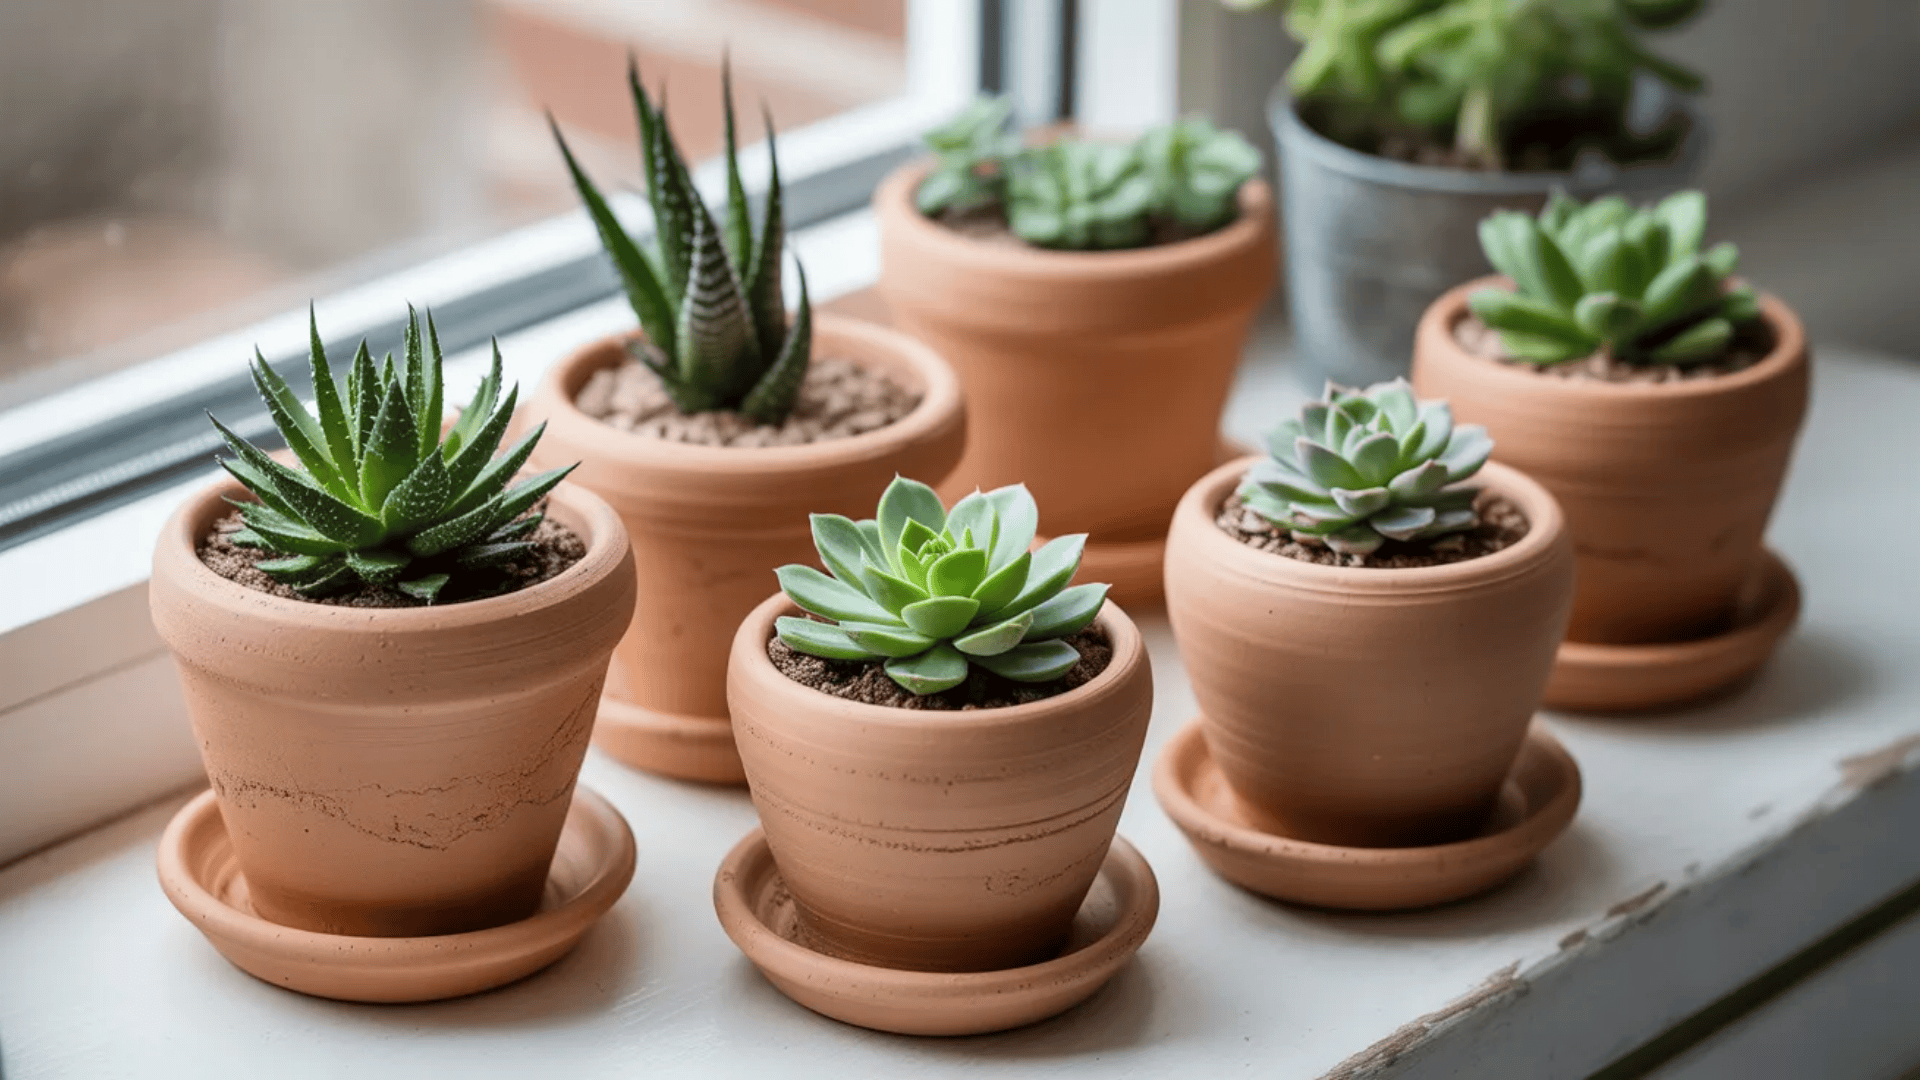
Small clay pots are perfect for succulents and tiny plants. They teach you basic molding techniques.
What you need: Air-dry clay, a small bowl for shaping, water, and sandpaper.
Roll clay into a ball about the size of your palm. Press your thumb into the center to create a hollow space.
Slowly pinch and rotate the clay to form thin walls. Keep the base thicker than the sides for stability. Smooth the surface with damp fingers. Let it dry completely for 48 hours.
Sand the rim smooth once dry. You can paint the outside or leave it natural.
Pro Tip: Poke a small hole in the bottom before it dries for proper water drainage.
5. Clay Beads for Necklaces
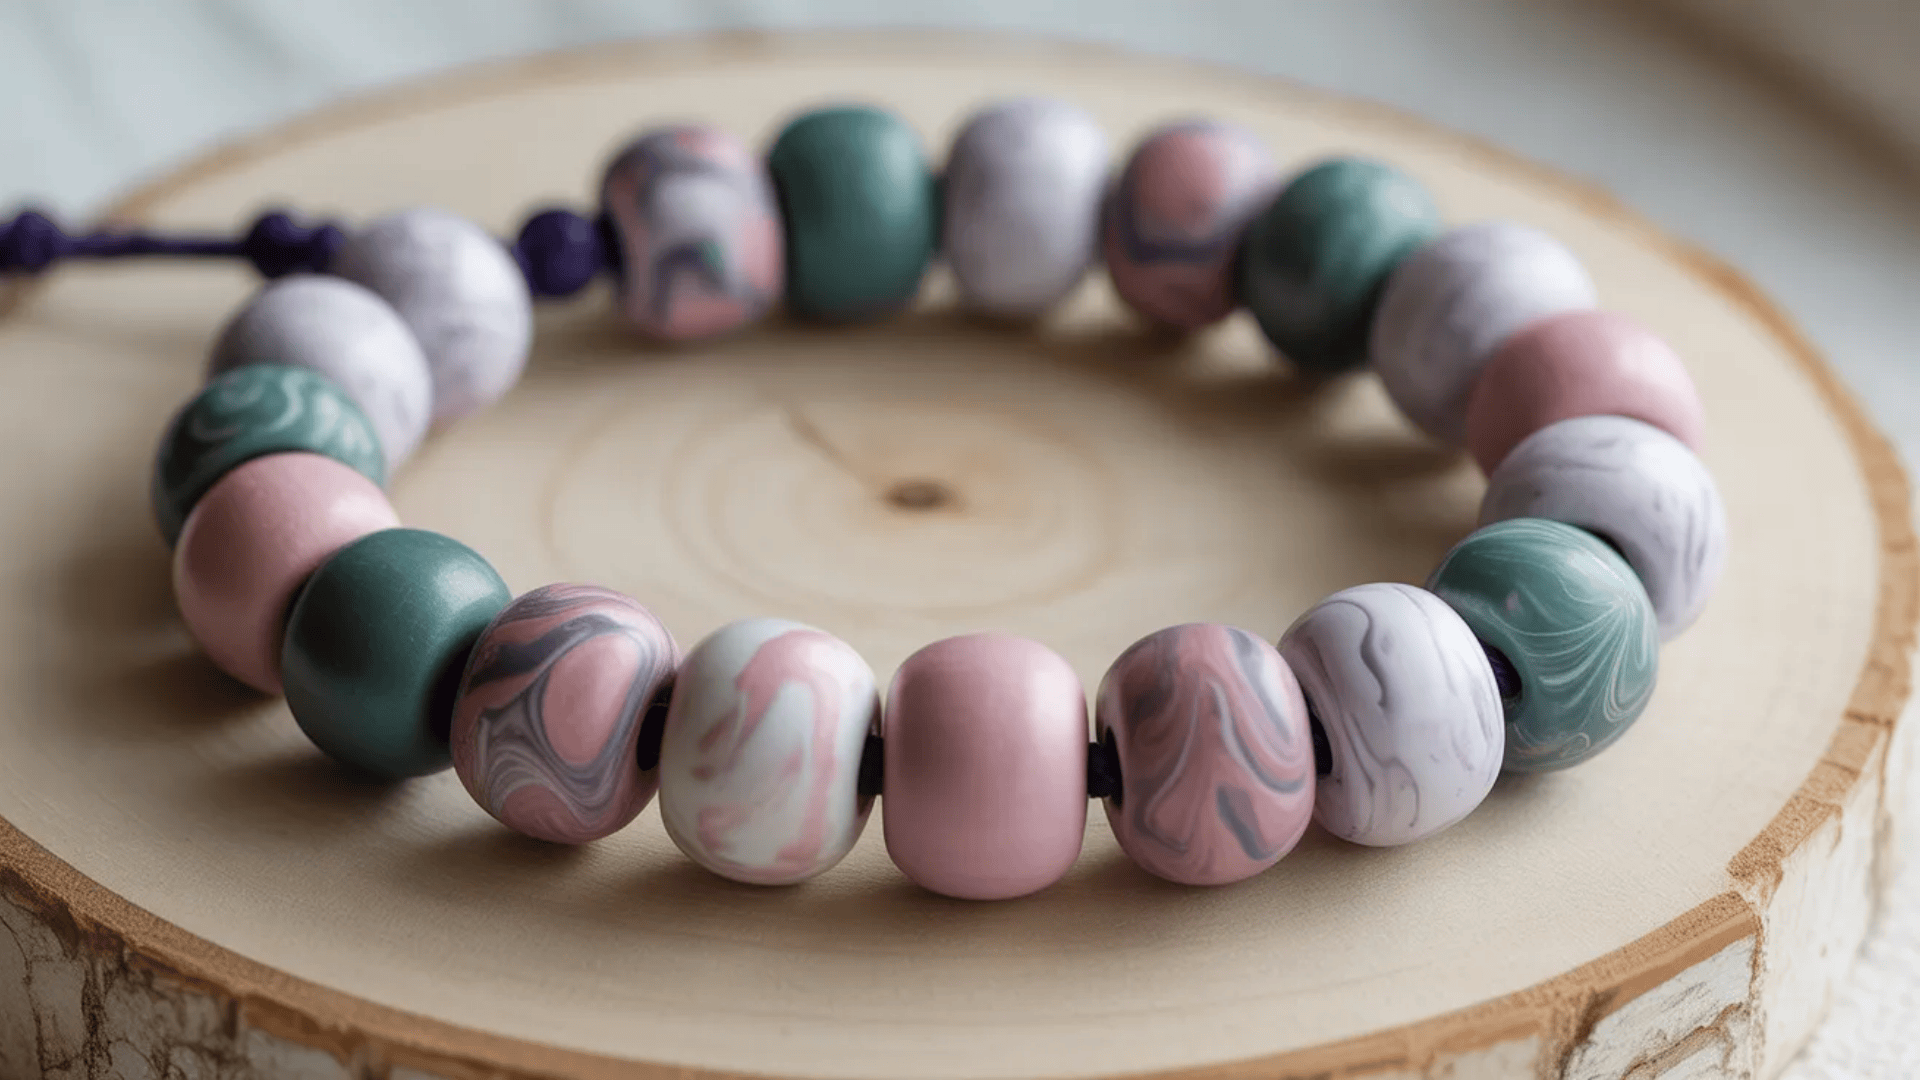
Making clay beads lets you design custom jewelry. It’s a relaxing project with beautiful results.
What you need: Polymer clay, toothpicks or skewers, oven, and string or cord.
Roll small amounts of clay into uniform balls. Keep them consistent in size for a professional look.
Push a toothpick through the center of each bead. Rotate gently to make the hole smooth and even. Bake on the toothpicks according to package directions. This keeps the holes open while baking.
Let them cool, then remove from the toothpicks. String them on a cord with a clasp to complete your necklace.
Pro Tip: Alternate colors or sizes for visual interest and a more professional finish.
Intermediate Clay Project Ideas
Ready to take your clay skills further? These projects require a bit more technique and patience. You’ll work with larger pieces and more detailed shapes.
These intermediate projects help you master control and precision. You’ll learn to create functional items that you can actually use every day. Each project pushes your abilities just enough to keep improving.
6. Clay Mugs
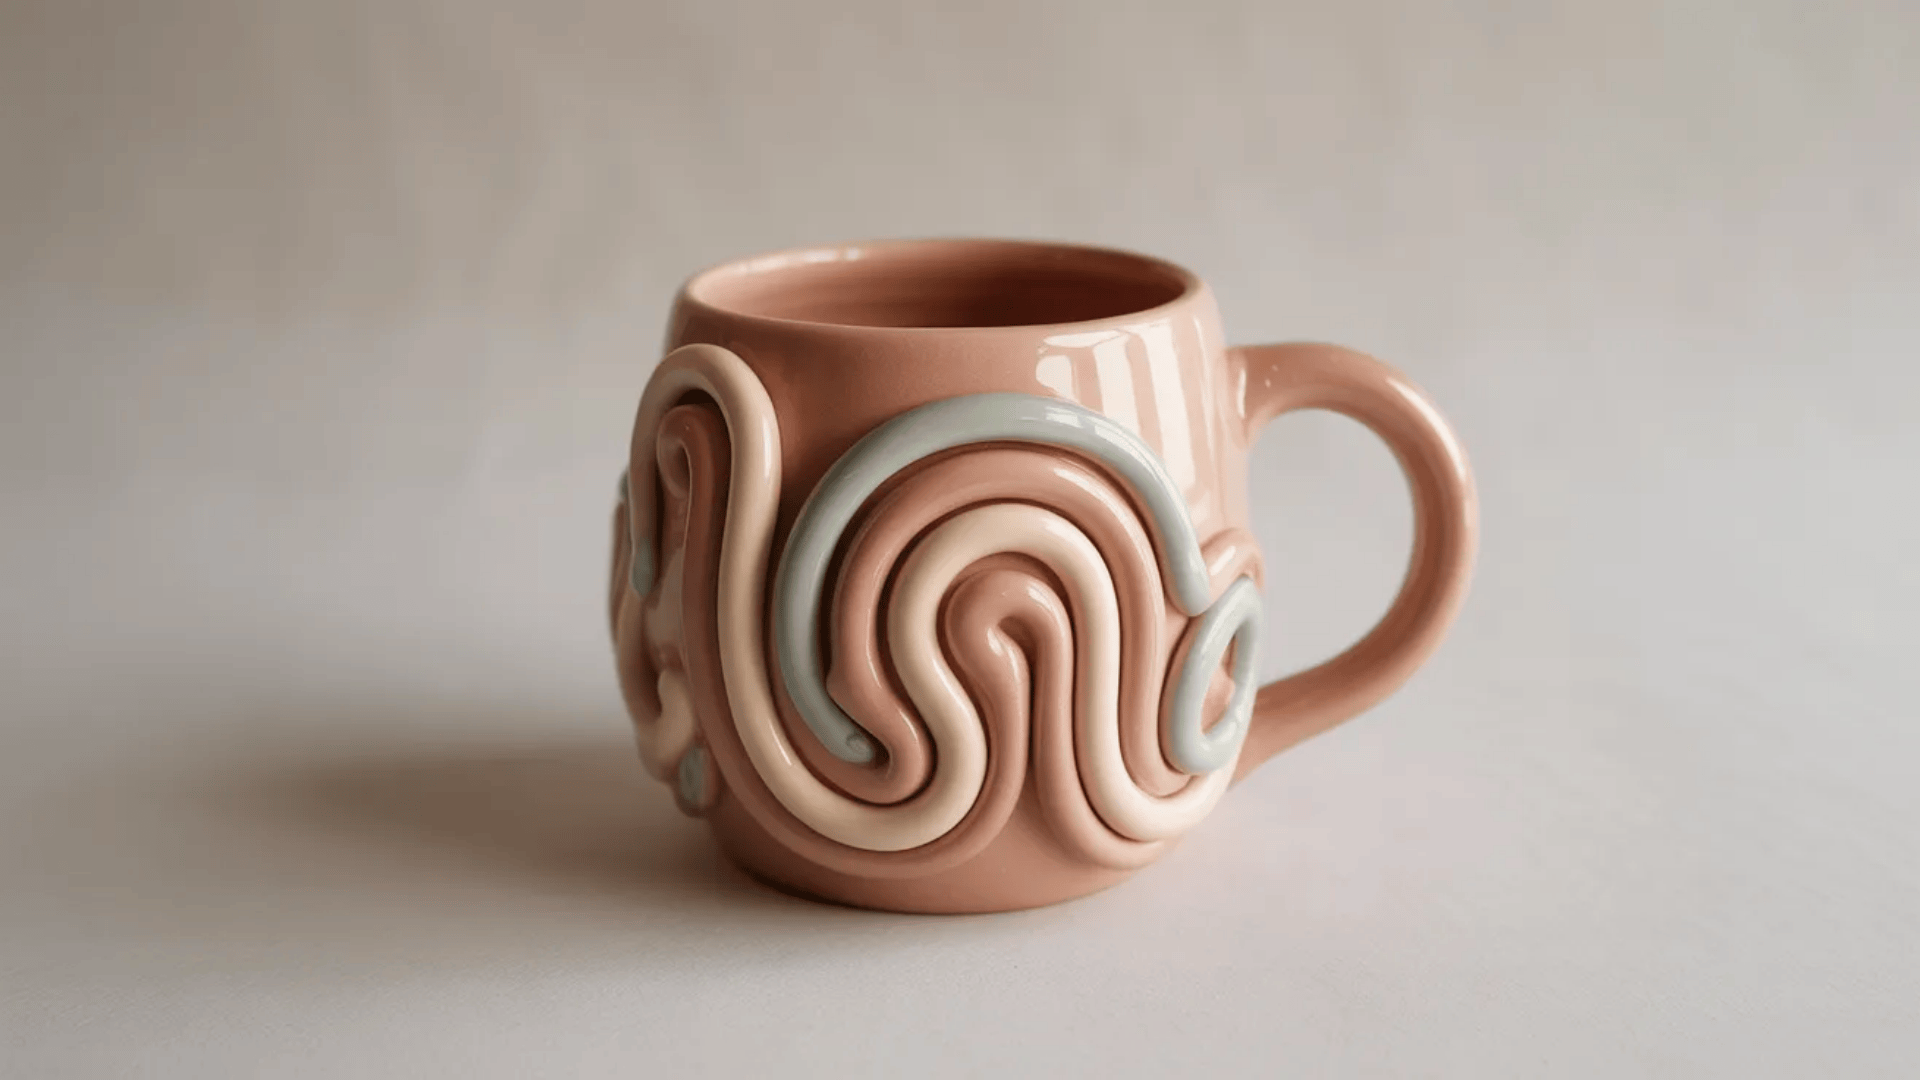
Creating your own mug from clay is satisfying and practical. You’ll have a one-of-a-kind piece for your morning coffee.
What you need: Oven-safe clay, mug template, sculpting tools, handle mold, and glaze.
Roll out a slab of clay about a quarter inch thick. Wrap it around a cylindrical form to create the mug body. Smooth the seam where the edges meet.
Roll a separate piece for the handle. Shape it into a comfortable curve. Attach it firmly to the mug body using slip (watered-down clay).
Let it dry slowly to prevent cracking. Fire it in a kiln if you have access to one. Apply food-safe glaze and fire again. If you don’t have a kiln, use oven-bake clay instead. Follow the temperature guidelines on the package carefully.
Pro Tip: Score both surfaces and add slip before attaching the handle for a stronger bond.
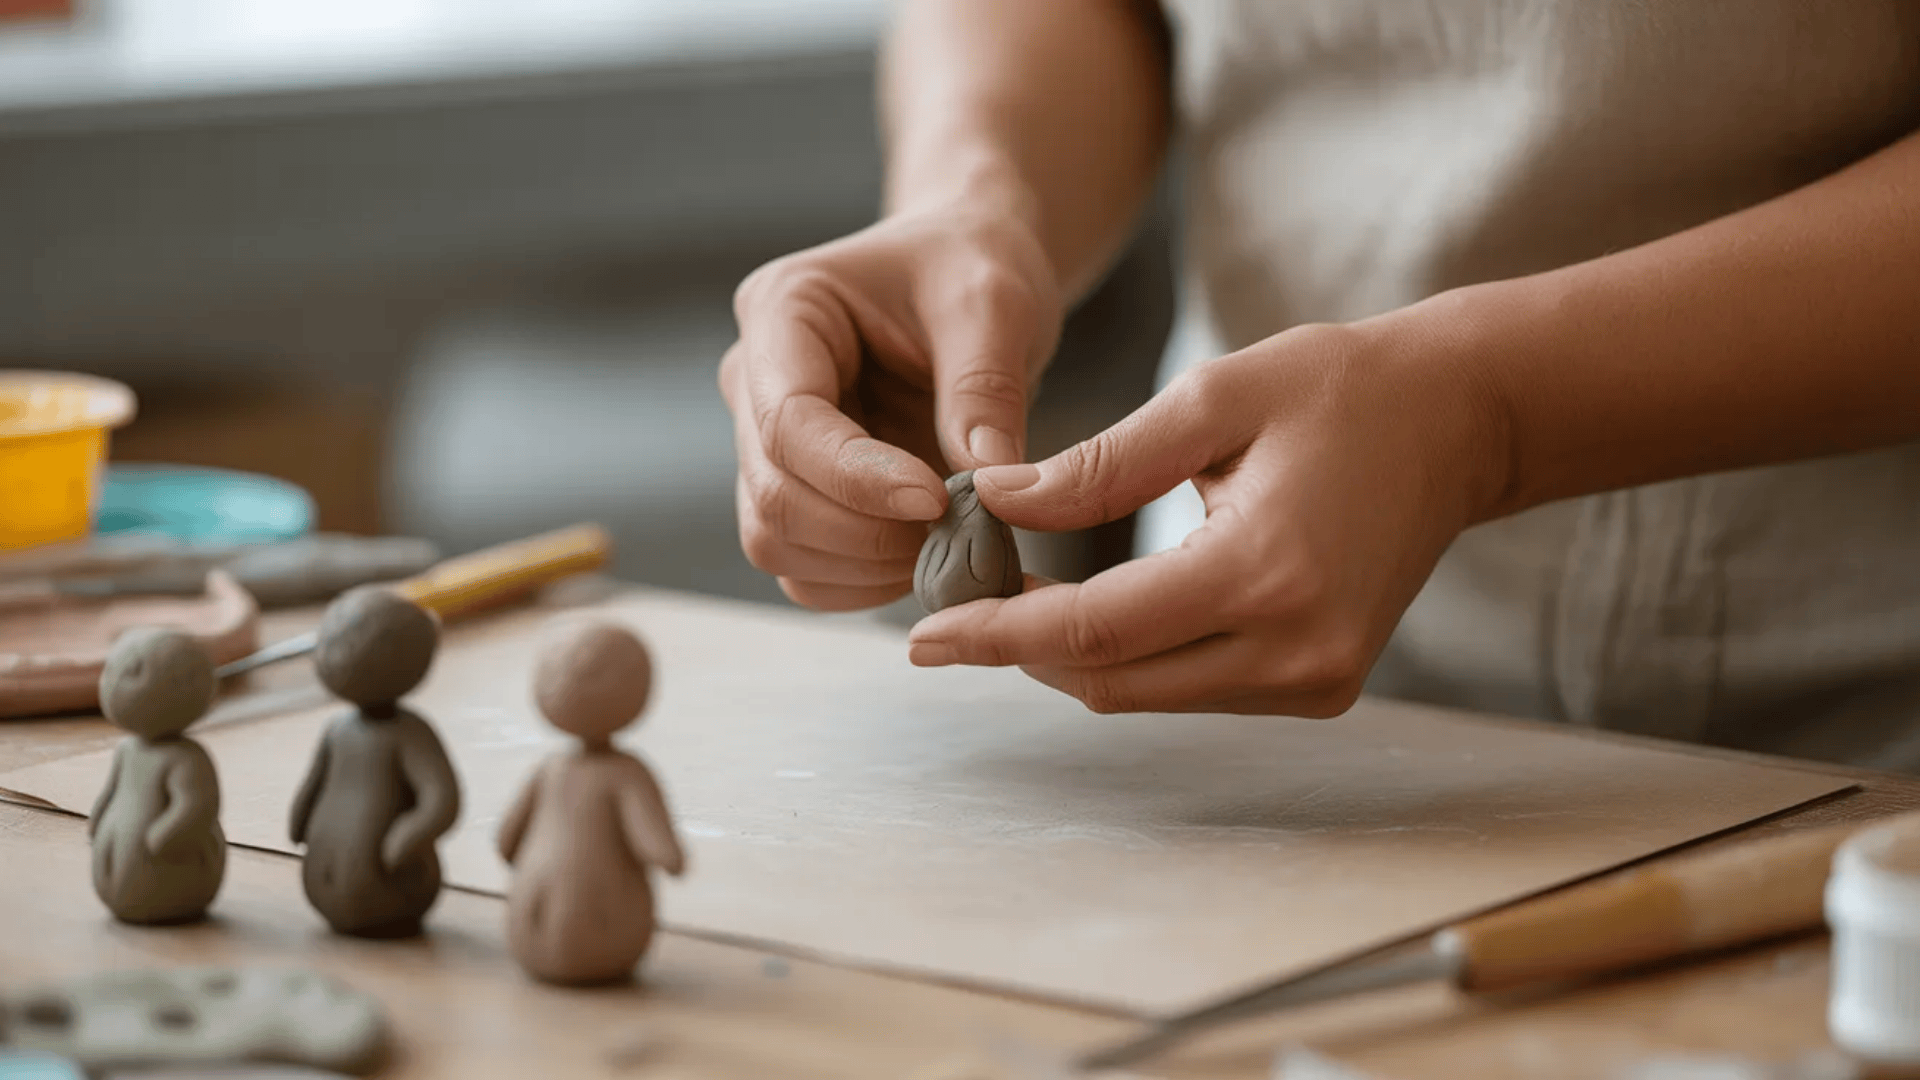
7. Clay Animal Figurines

Animal figurines let you practice detailed sculpting. They make great desk decorations or gifts for animal lovers.
What you need: Polymer clay, sculpting tools, reference photos, and an oven.
Start with basic shapes for the body. Roll a ball for the head and an oval for the body. Add legs, tail, and ears using smaller pieces. Blend the pieces together smoothly using your fingers or tools. Add details like eyes, nose, and texture using toothpicks or small tools.
Check your reference photo often to get proportions right. Take your time with facial features as they bring personality to your figurine.
Bake according to the clay instructions. Let it cool completely before handling. Paint details if needed or leave the natural clay color. Seal with a matte or gloss finish.
Pro Tip: Start with simple animals like cats or dogs before attempting complex creatures with many details.
8. Wall Hooks
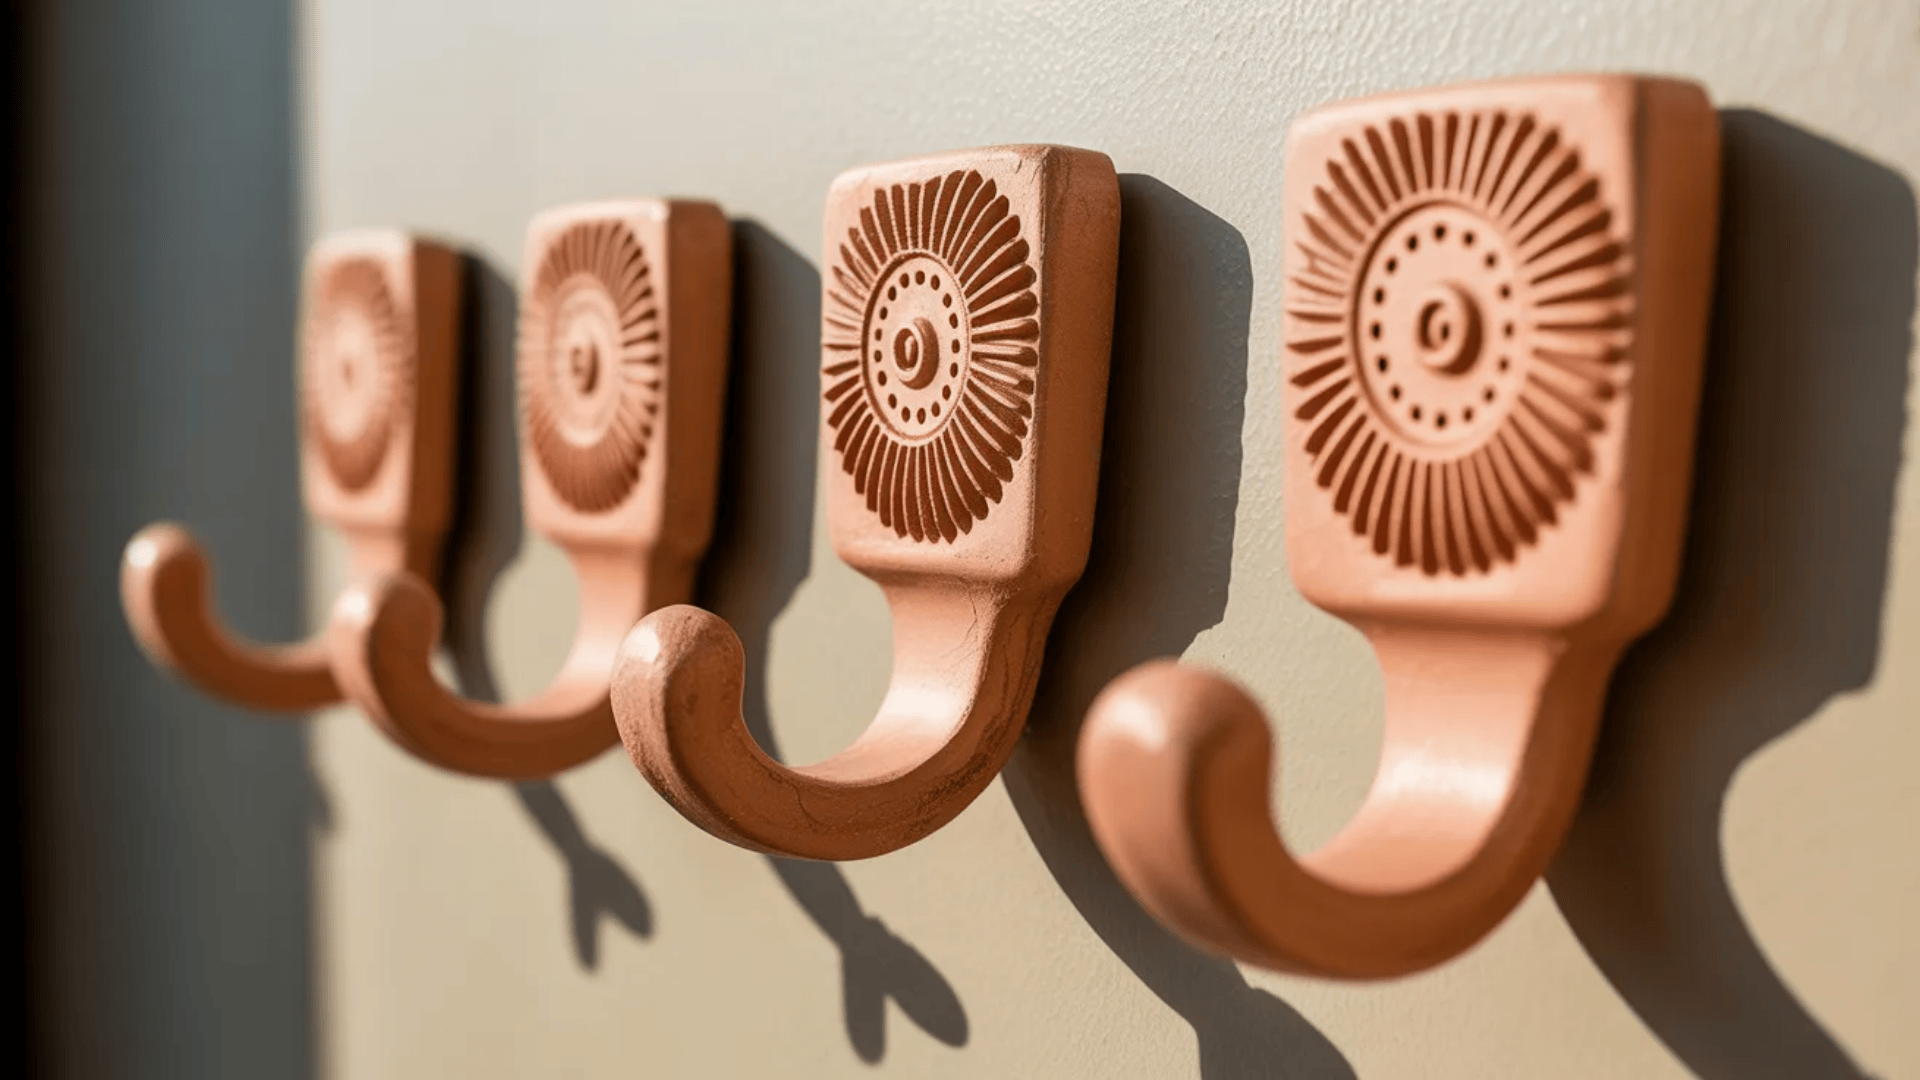
Clay wall hooks combine function with style. They hold coats, bags, or keys while adding character to your walls.
What you need: Strong air-dry clay, mounting hardware, drill, strong adhesive, and paint.
Form a thick base that will mount flat against your wall. Shape a hook or knob that extends outward. Make it thick enough to hold weight without breaking.
Create a decorative front surface. Add patterns, shapes, or textures to match your home style. Let it dry for at least 48 hours. The clay needs to be completely hard before mounting.
Drill a small hole through the base. Use a wall anchor and screw to mount it securely. Test the strength before hanging anything heavy.
Pro Tip: Make the base at least one inch thick for maximum strength and durability.
9. Clay Spoons or Utensils
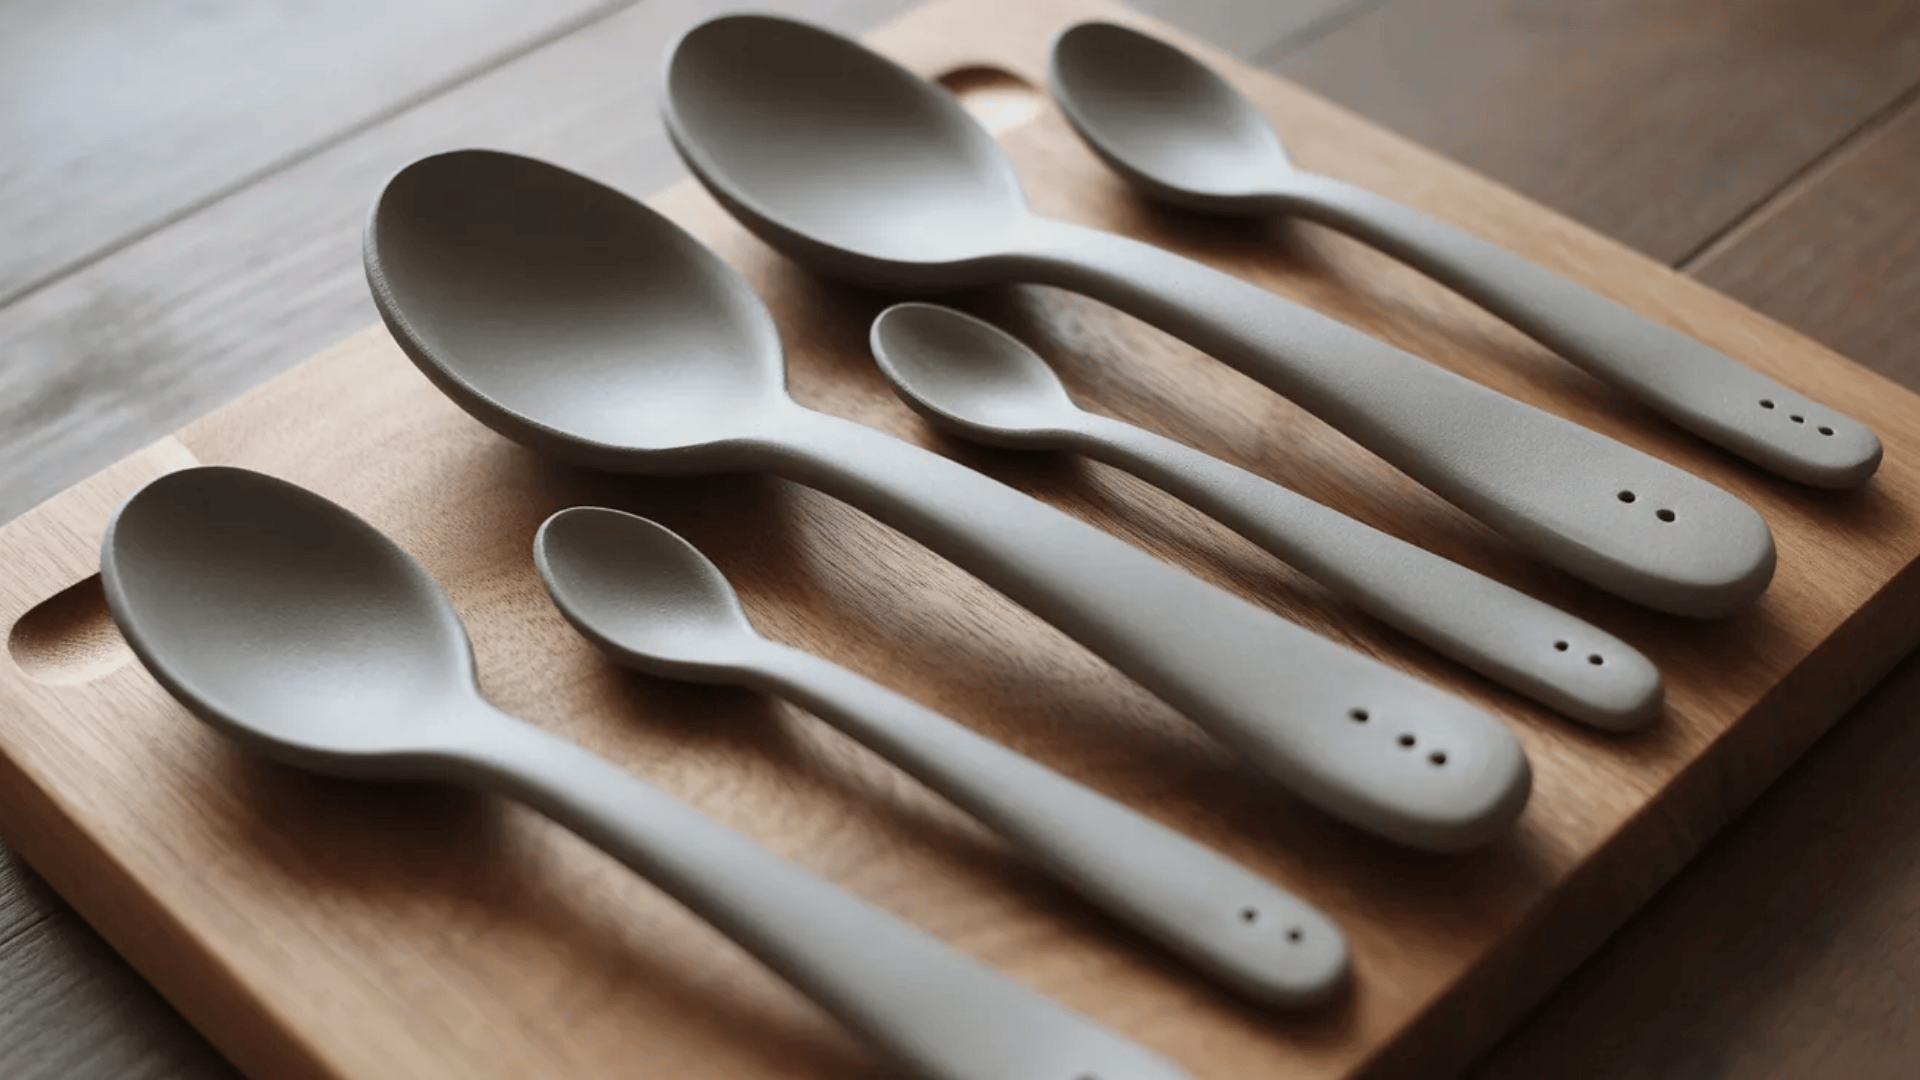
Handmade utensils add a personal touch to your kitchen. They work great for serving or cooking.
What you need: Food-safe clay, spoon template, sculpting tools, kiln access, and food-safe glaze.
Roll clay into a thick slab. Cut out a spoon shape using a template or freehand. Carve out the bowl portion carefully.
Shape the handle to fit comfortably in your hand. Smooth all surfaces thoroughly. Any rough spots will be uncomfortable to use. Let it dry slowly and evenly.
Fire in a kiln following proper temperature guidelines. Apply food-safe glaze and fire again.
These utensils need kiln firing to be safe for food use. Oven-bake clay is not suitable for cooking utensils.
Pro Tip: Make the handle slightly longer than you think you need for better grip and control.
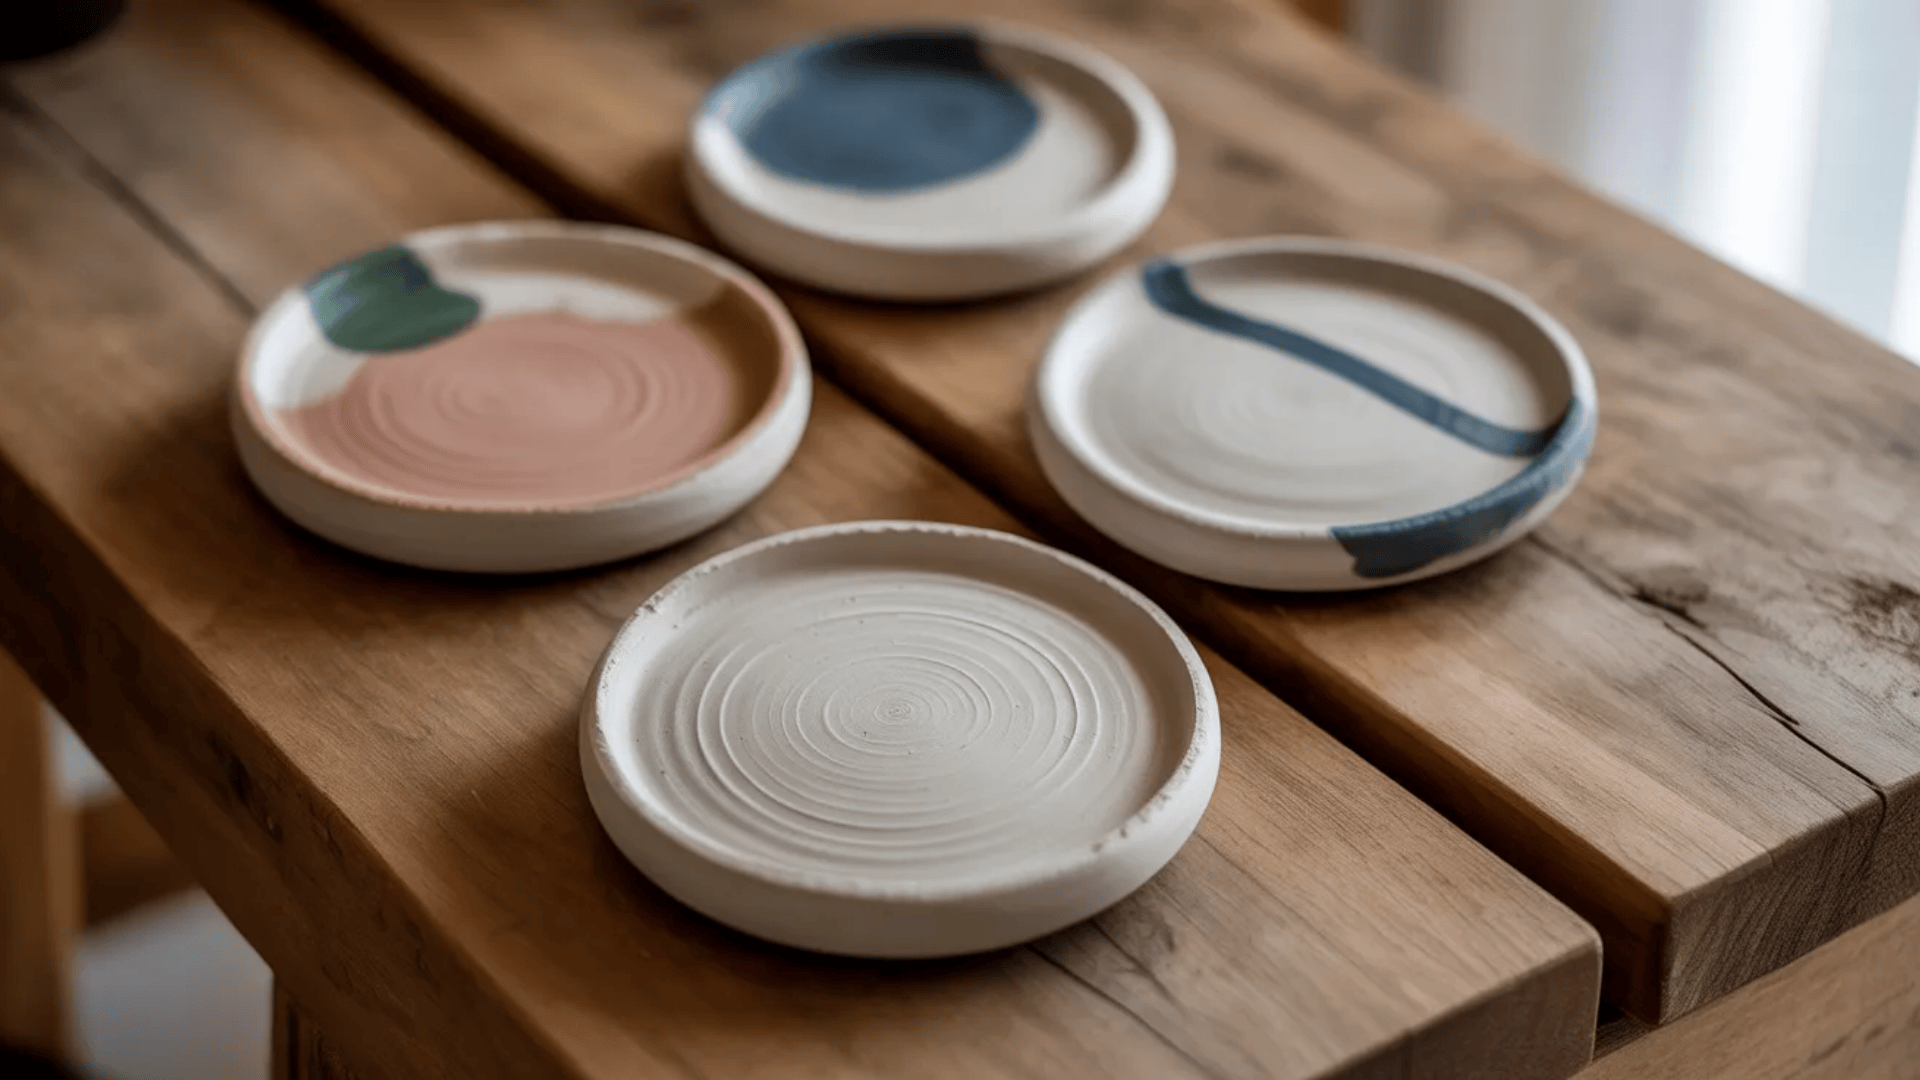
10. Decorative Clay Bowls
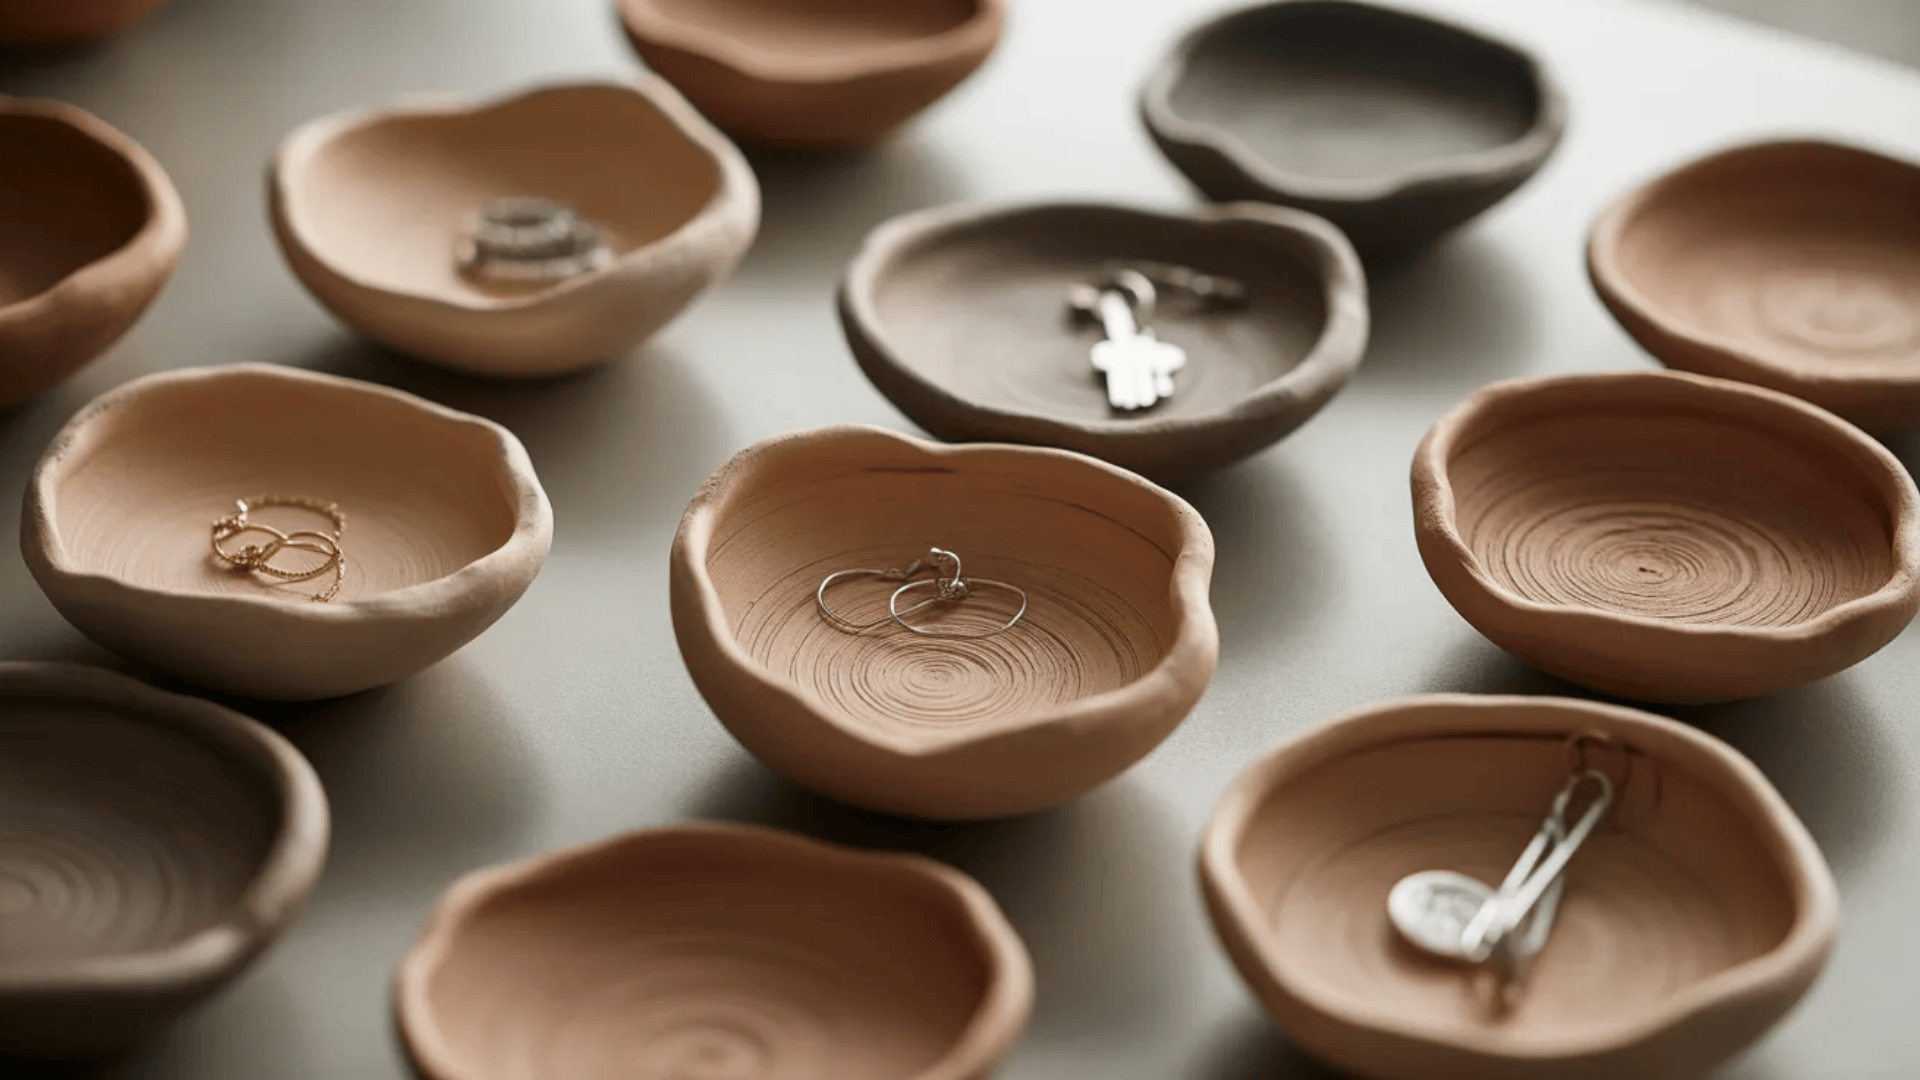
Clay bowls are beautiful and functional. Use them for jewelry, keys, or small items around your home.
What you need: Air-dry or polymer clay, a bowl for molding, plastic wrap, and sealant.
Cover a bowl with plastic wrap. This prevents the clay from sticking during shaping.
Roll the clay into a flat circle about a quarter inch thick. Drape it over the upside-down bowl. Press gently to shape it. Trim the edges for a clean finish. Add patterns or textures to the surface if desired.
Let it dry completely in the bowl form. Remove carefully once fully hardened. Sand any rough edges smooth. Paint or seal as desired. These bowls are decorative and work for lightweight items only.
Pro Tip: Use bowls of different sizes to create a matching set for your home.
Advanced Clay Projects for Experienced Crafters
These projects challenge your clay skills in new ways. They require patience, precision, and knowledge of advanced techniques.
You’ll work with complex shapes and intricate details. These pieces take more time but produce impressive results. They’re perfect for crafters ready to push their limits.
11. Clay Sculpture
Creating a full sculpture lets you express artistic vision. These pieces become statement art for your home or studio.
What you need: Sculpting clay, armature wire, sculpting tools, a turntable, and sealant or a kiln.
Build an armature from wire to support your sculpture. This skeleton prevents sagging and adds stability. Wrap the wire framework with aluminum foil to save clay.
Apply clay in layers over the armature. Start with large forms and work toward fine details. Keep the clay moist as you work. Step back often to view your sculpture from all angles. Use a turntable to rotate your work easily. Add or remove clay to refine the shape.
Create texture and detail with various tools. Smooth surfaces with water and fingers. Let it dry slowly to prevent cracking. Fire in a kiln or seal with a strong protective coating. Display on a sturdy base.
Pro Tip: Work on multiple areas at once so you don’t overwork one section while it’s still soft.
12. Clay Tiles for Mosaic Projects
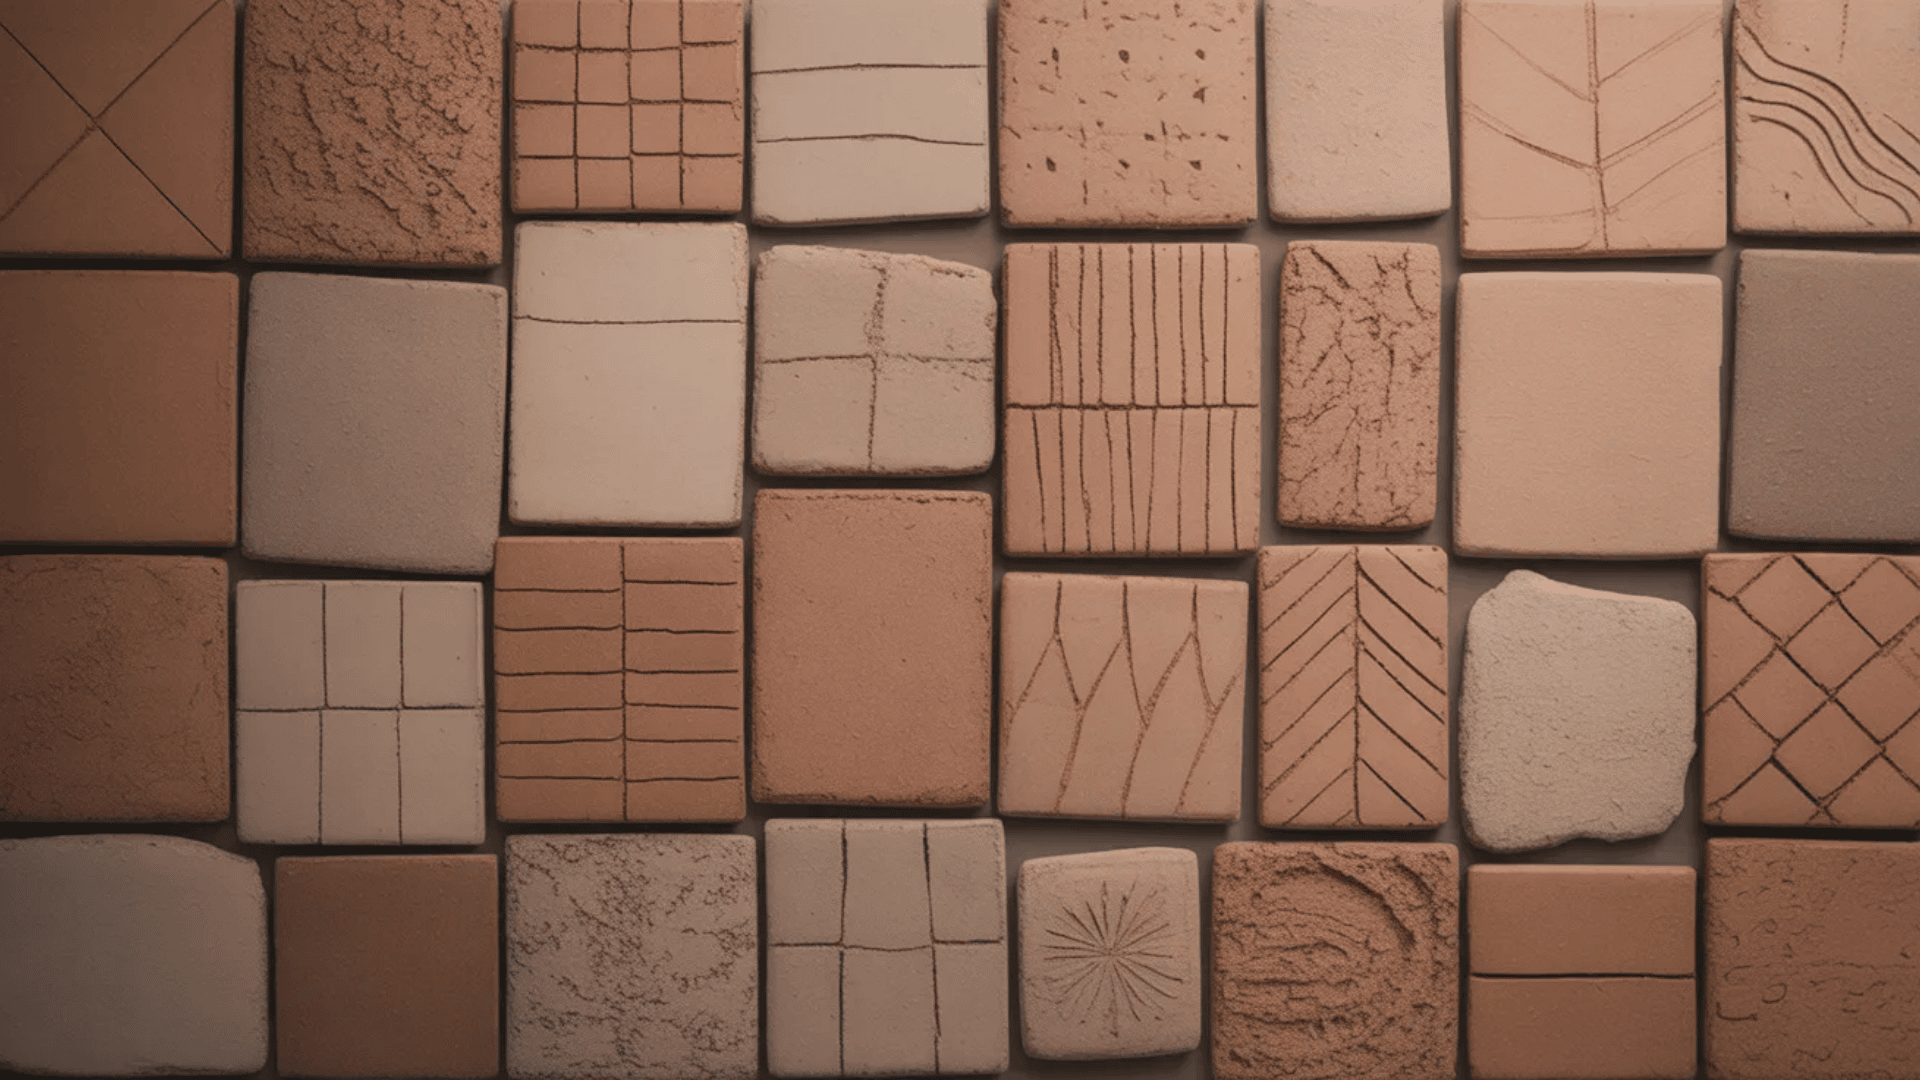
Handmade tiles give mosaics a personal touch. You control the colors, shapes, and sizes perfectly.
What you need: Polymer or terracotta clay, roller, tile cutters, texture tools, and a kiln or oven.
Roll clay to a consistent thickness of about a quarter inch. Use guides on both sides of your roller for even results. Cut tiles into uniform shapes using a ruler and blade. Squares, rectangles, and triangles work well for mosaics. Keep sizes consistent for easier arrangement.
Add texture or patterns to each tile surface. Press stamps, fabric, or found objects into the clay. Create depth and visual interest. Poke small holes if you plan to string tiles together. Otherwise, leave them solid for traditional mosaic work.
Bake or fire according to your clay type. Let them cool completely. Arrange and glue them onto your mosaic surface.
Pro Tip: Make extra tiles in each color so you have options when arranging your final mosaic design.
13. Intricate Jewelry Designs
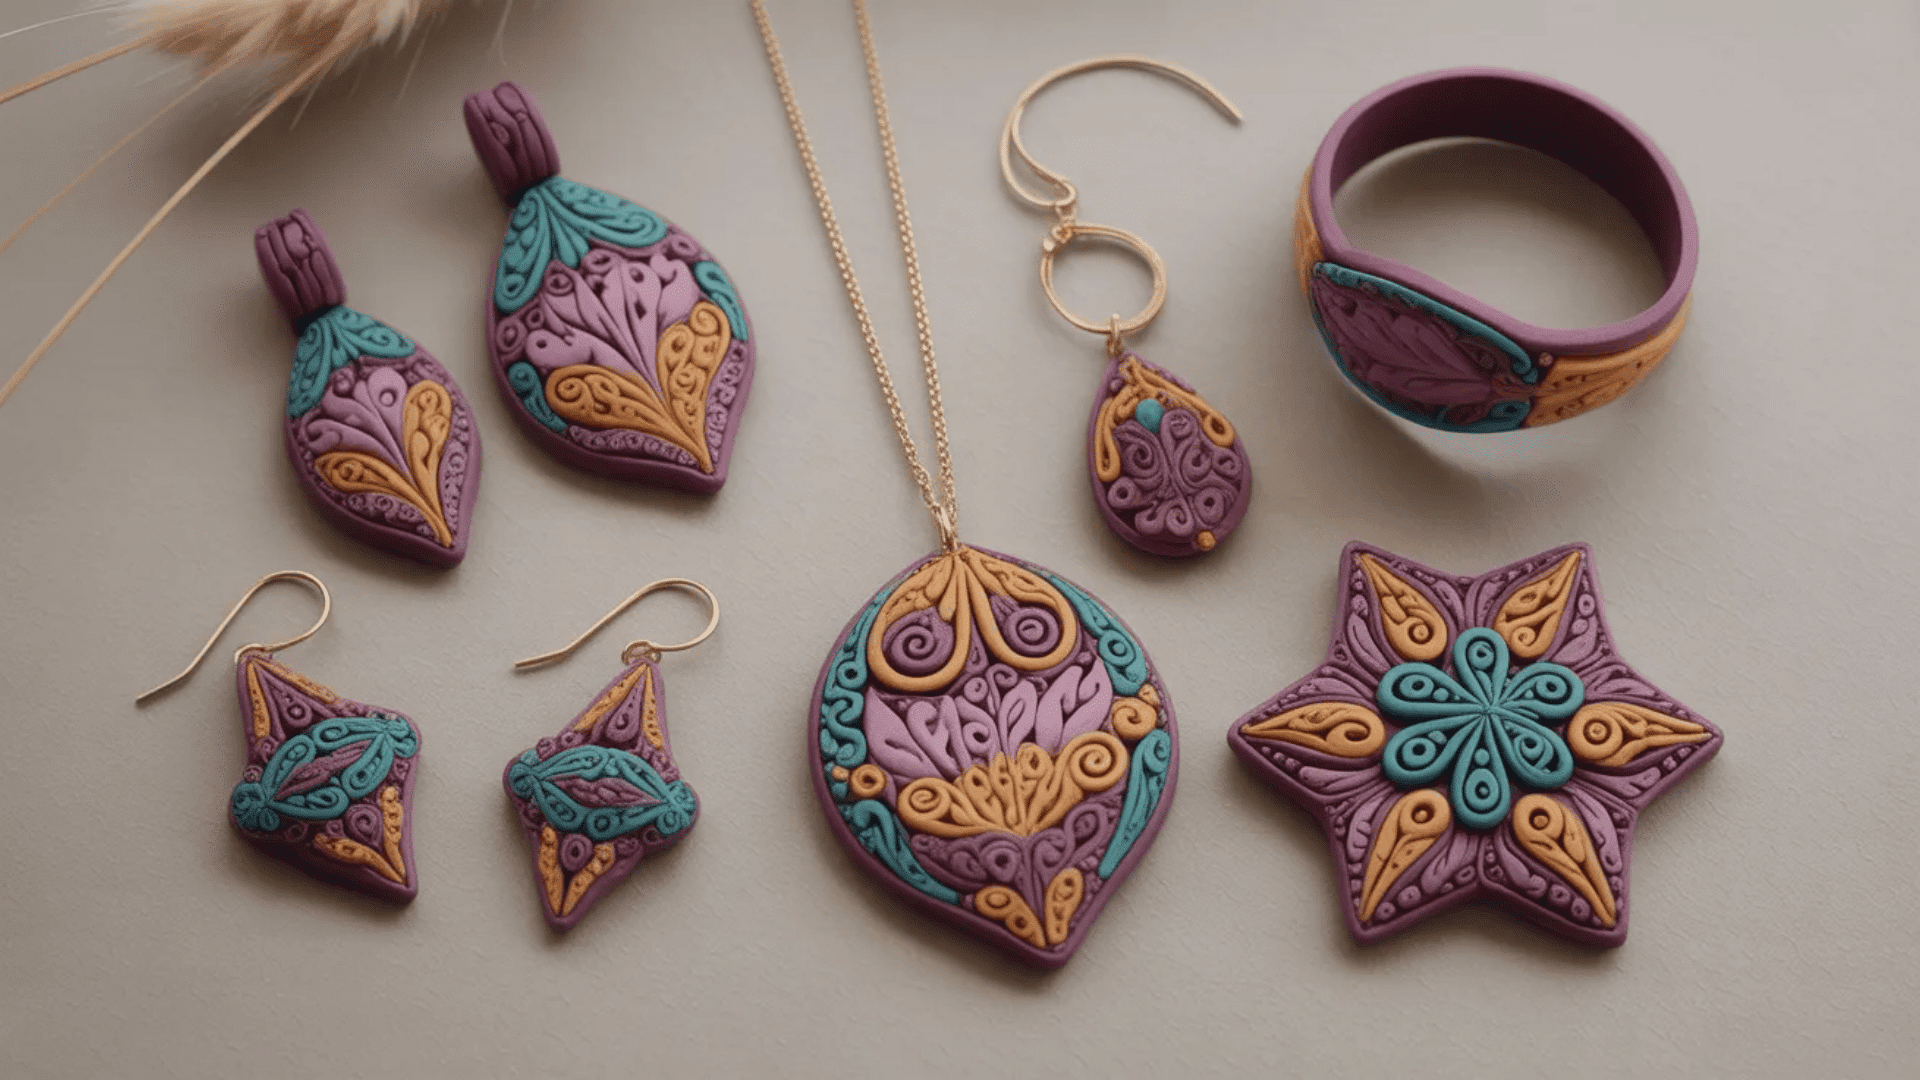
Advanced jewelry combines multiple techniques into one piece. These designs showcase your mastery of clay work.
What you need: Polymer clay in multiple colors, jewelry findings, texture sheets, blade, and oven.
Plan your design on paper first. Complex jewelry needs forethought to execute well. Sketch the shapes and how they connect. Use caning techniques to create patterns. Roll different colored clays together and slice thin sections. These slices reveal intricate designs.
Layer translucent and opaque clays for depth. Add metal leaf, mica powders, or other embellishments. Combine sculpted elements with flat pieces. Create interesting textures using stamps, sandpaper, or fabric. Drill holes precisely for findings and connections.
Bake according to package directions. Assemble all components with jump rings and clasps. Polish if desired for a professional shine.
Pro Tip: Test your clay combinations and techniques on scrap pieces before working on final jewelry components.
14. Ceramic Vases
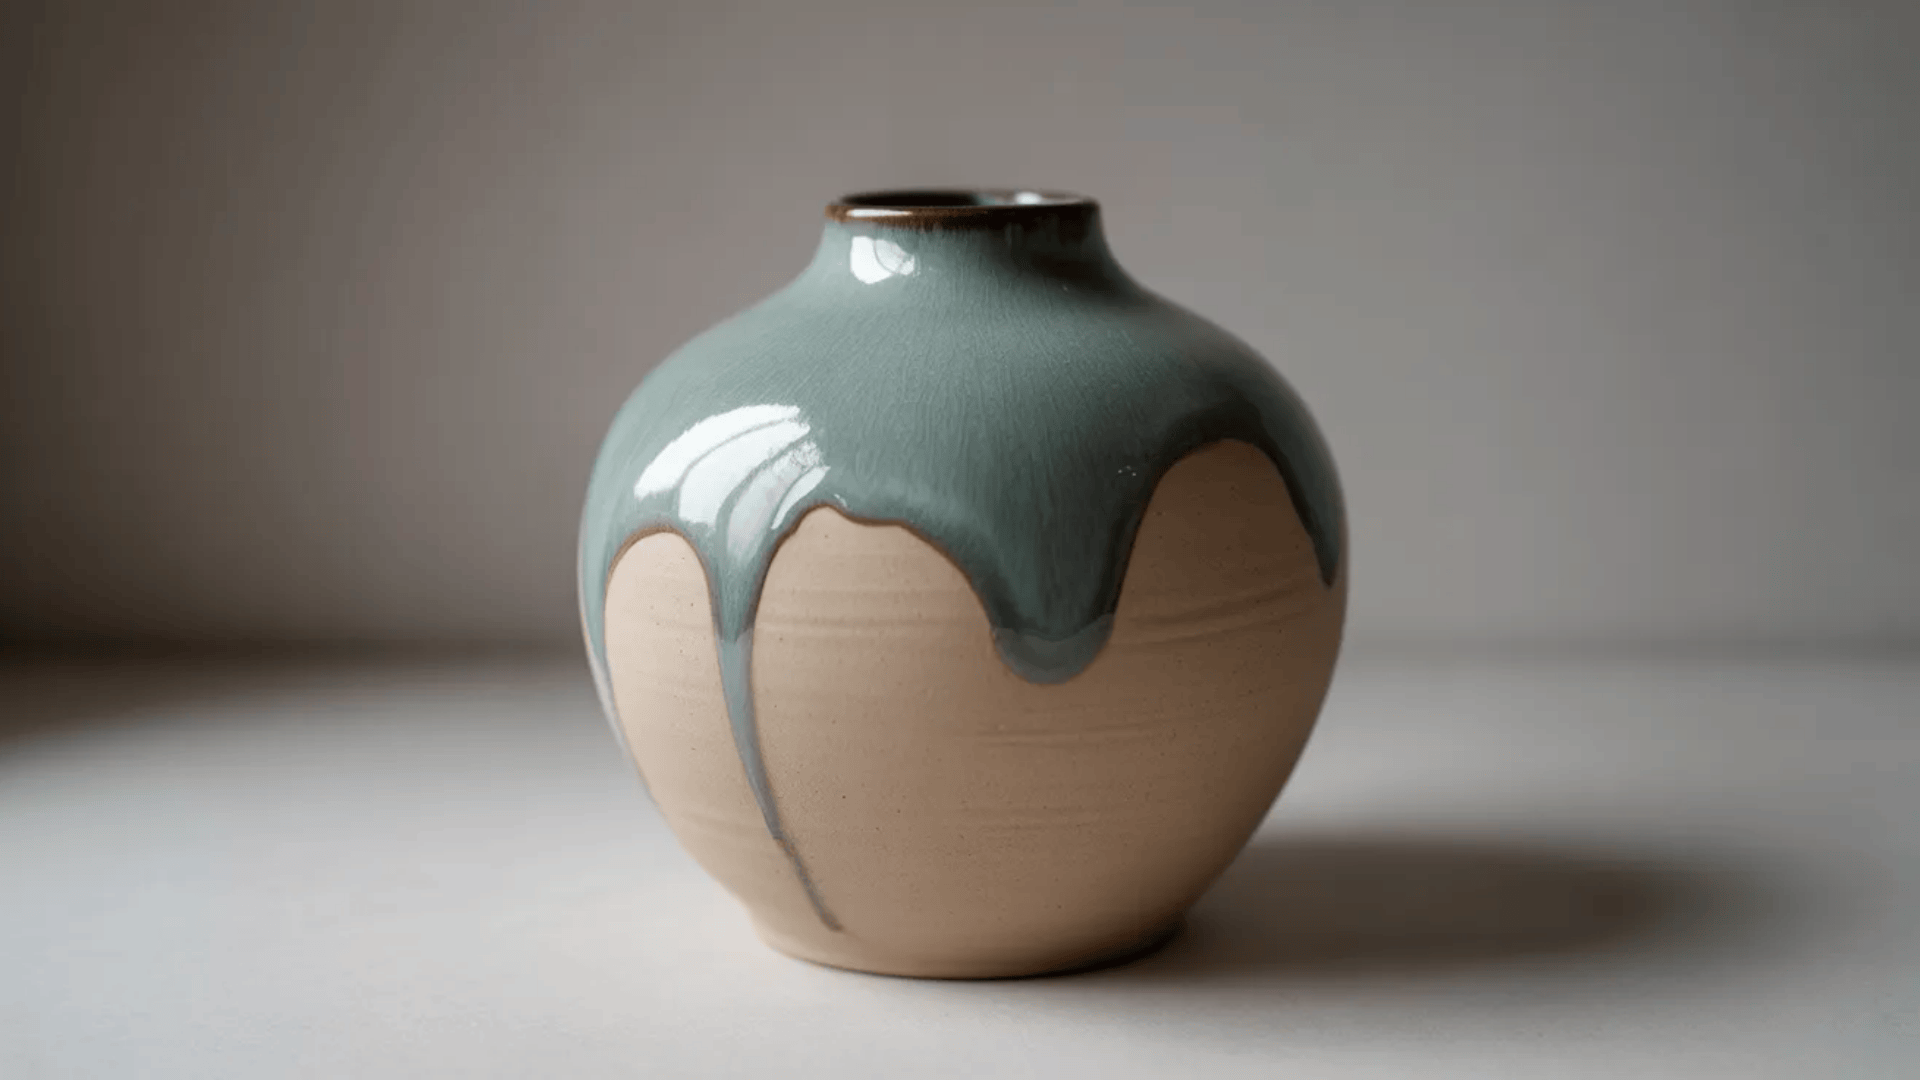
Wheel-thrown vases are classic pottery projects. They require access to a pottery wheel and kiln.
What you need: Pottery wheel, terracotta or stoneware clay, trimming tools, kiln, and glaze.
Center your clay on the wheel. This is the most important step. Press down firmly while the wheel spins. The clay should spin without wobbling.
Open the center with your thumbs. Pull the walls up slowly and evenly. Keep even pressure with both hands. Add water to keep the clay slippery. Shape the vase as it spins. Pull outward for wider sections. Keep pressure inward for narrow necks. Work slowly to maintain control.
Remove the vase carefully using a wire tool. Let it dry to the leather-hard stage. Trim the base and refine the shape. Dry completely, then bisque fire. Apply the glaze and fire again to the final temperature. Each clay type has specific firing requirements.
Pro Tip: Practice centering and pulling cylinders many times before attempting complex vase shapes.
15. Clay Wall Art
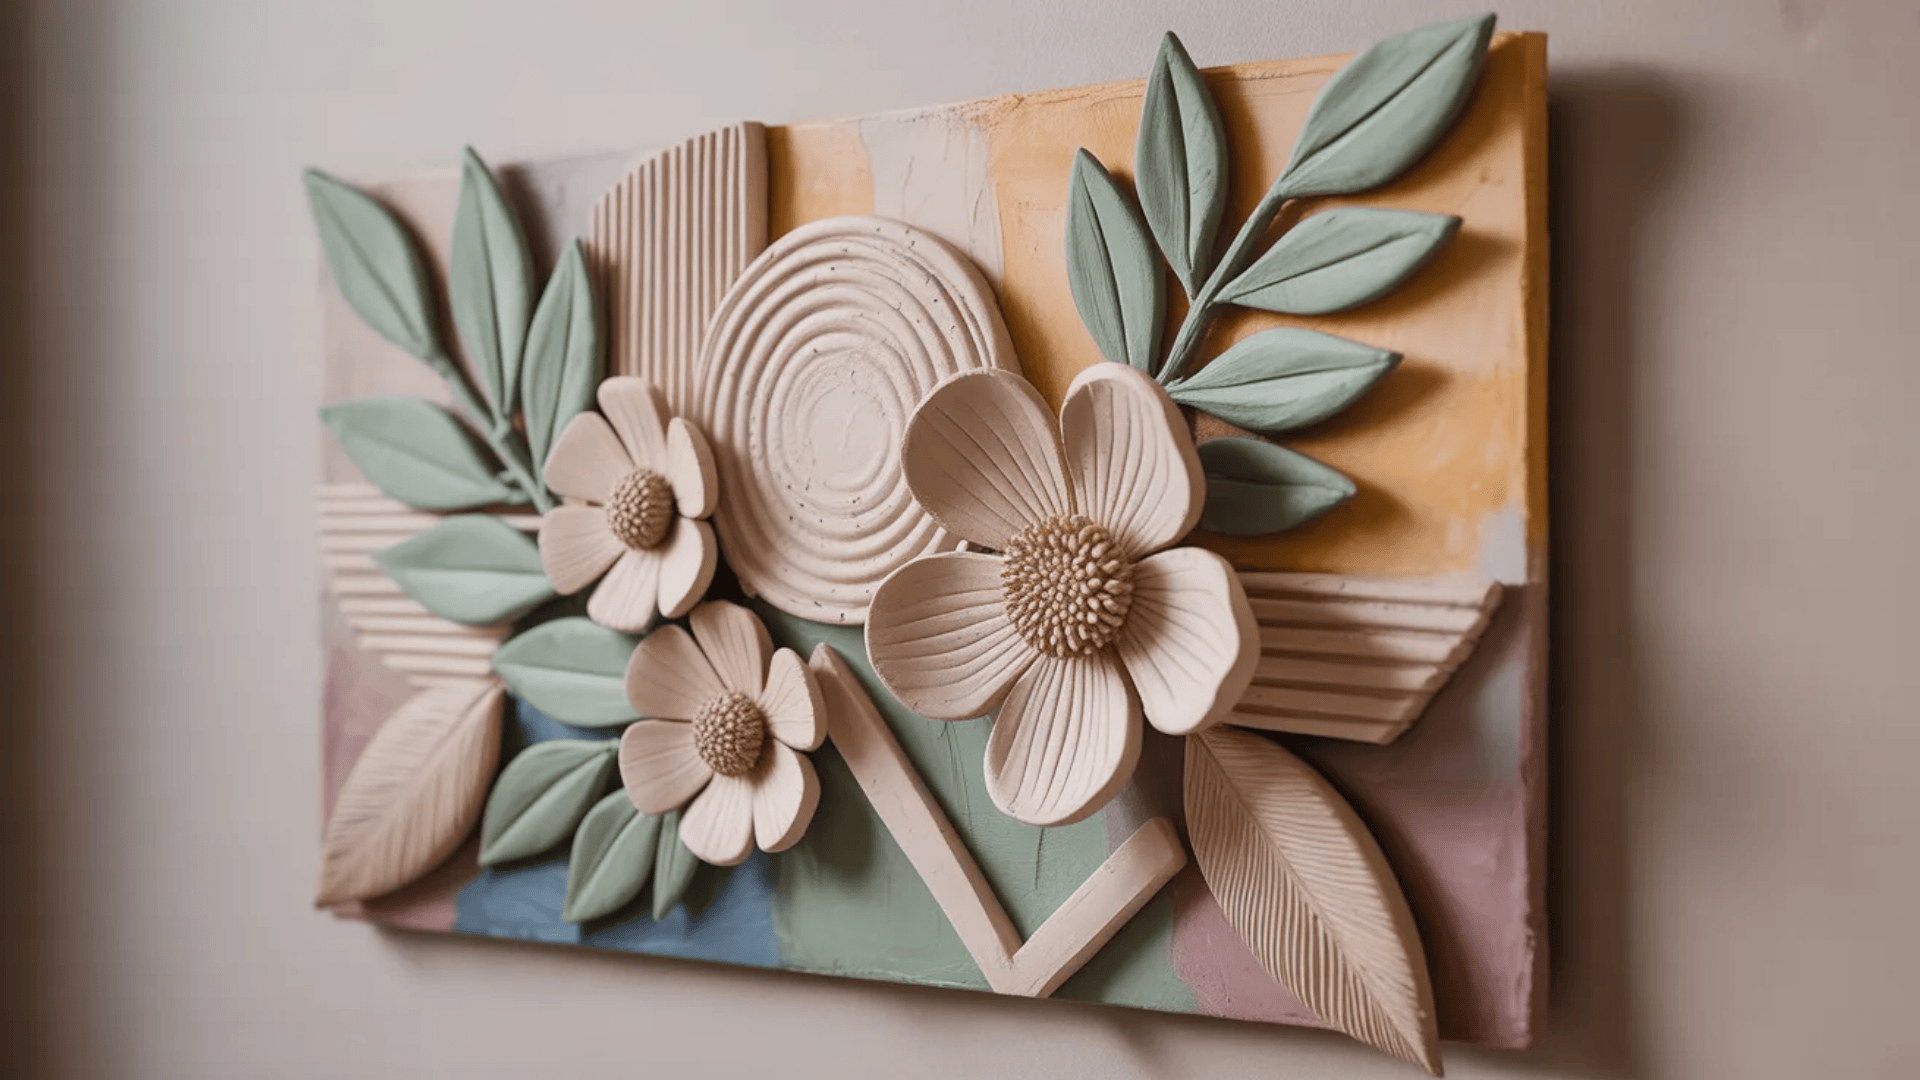
Wall art pieces combine sculpture with painting. They add dimension and texture to any room.
What you need: Air-dry or firing clay, backing board, strong adhesive, acrylic paints, and sealant.
Design your composition on paper first. Plan how elements will attach to the backing. Consider weight distribution carefully.
Create individual clay elements separately. Make flowers, leaves, geometric shapes, or abstract forms. Add texture and detail to each piece. Let all pieces dry completely. Sand rough edges smooth. Arrange them on your backing board before gluing.
Attach pieces securely using strong adhesive. Let the glue cure fully before hanging. Add wire or hanging hardware to the back. Paint your wall art with acrylics. Layer colors for depth. Seal everything with a protective coating.
Pro Tip: Create lightweight pieces by keeping them thin or hollow to prevent the artwork from being too heavy to hang.
Clay Projects for Special Occasions
Special events deserve handmade touches. Clay projects make memorable gifts and decorations that guests will love.
These occasion-based projects work for weddings, holidays, and celebrations. They add personal meaning to important moments. People appreciate the time and thought you put into creating something unique.
16. Custom Clay Wedding Favors

Handmade wedding favors show guests you care. Clay items are durable keepsakes that won’t get thrown away.
What you need: Polymer clay, stamps with initials or dates, cookie cutters, ribbon, and small boxes.
Choose a simple shape that matches the wedding theme. Hearts, circles, or custom shapes work well. Keep them small enough to fit in favor boxes. Roll the clay to a quarter-inch thickness. Cut shapes using cookie cutters. Press stamps into each piece with the couple’s initials and wedding date.
Add a small hole at the top if you want to attach ribbon. Bake according to package directions. Let them cool completely. Package each favor in a small box with tissue paper. Add ribbon or tags with thank you messages. Make enough for all your guests plus extras.
Consider adding a small card explaining the favor. Tell guests it’s handmade and can be used as an ornament or keepsake.
Pro Tip: Make favors at least two months before the wedding to avoid last-minute stress and allow time for mistakes.
17. Holiday-Themed Clay Ornaments

Clay ornaments become family traditions. They last for years and can be personalized for each family member.
What you need: Air-dry or polymer clay, holiday cookie cutters, ribbon, paint, and clear sealant.
Roll the clay flat to about a quarter inch thick. Cut shapes using seasonal cookie cutters. Stars, trees, snowflakes, and bells work great. Add texture or patterns before the clay dries. Press lace, stamps, or textured fabric into the surface. Create unique designs for each ornament.
Poke a hole at the top for hanging ribbon. Make sure the hole is big enough for your ribbon to pass through easily. Let air-dry clay sit for 24 to 48 hours. Bake polymer clay following instructions. Paint with festive colors once cool.
Add names and dates to make them special. Thread ribbon through the holes. These ornaments make wonderful gifts, too.
Pro Tip: Create one new ornament design each year to build a collection of memories over time.
18. Personalized Clay Gifts
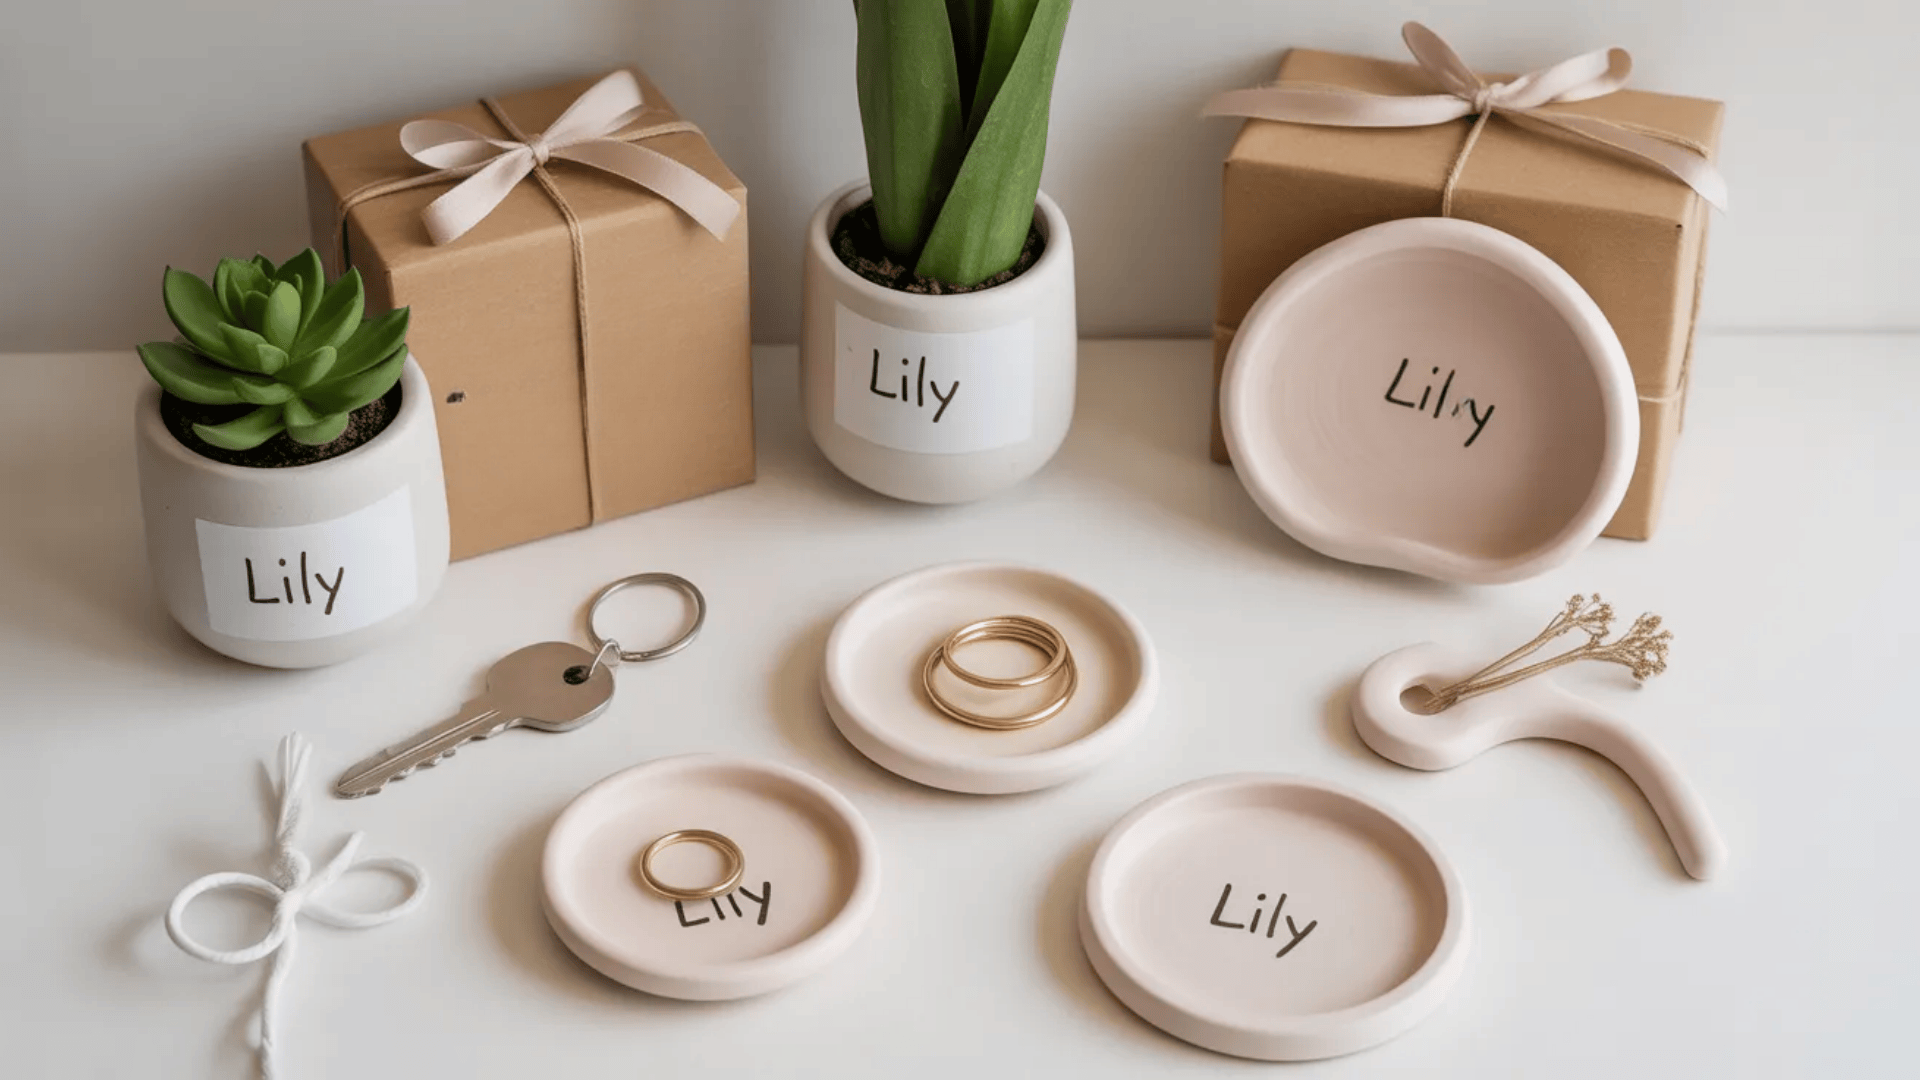
Custom gifts show people you know them well. Clay lets you create something they can’t buy in stores.
What you need: Clay appropriate for your project, personalization tools, paint, and packaging materials.
Think about the recipient’s interests and hobbies. Make items they’ll actually use or display. Practical gifts get more appreciation than purely decorative ones. Add personal touches like names, dates, or meaningful quotes. Use letter stamps or carve text by hand. Include inside jokes or special memories.
Choose colors and designs that match their style. Consider their home décor and personal taste. A well-matched gift feels more thoughtful. Create items like ring dishes, plant markers, key holders, or desk accessories. Make sure everything is sturdy and well-finished.
Package your gift nicely with a handwritten note. Explain why you made this specific item for them. The story adds value to the gift.
Pro Tip: Take photos of the person’s home style secretly beforehand so your gift matches their existing décor.
19. Clay Flower Arrangements
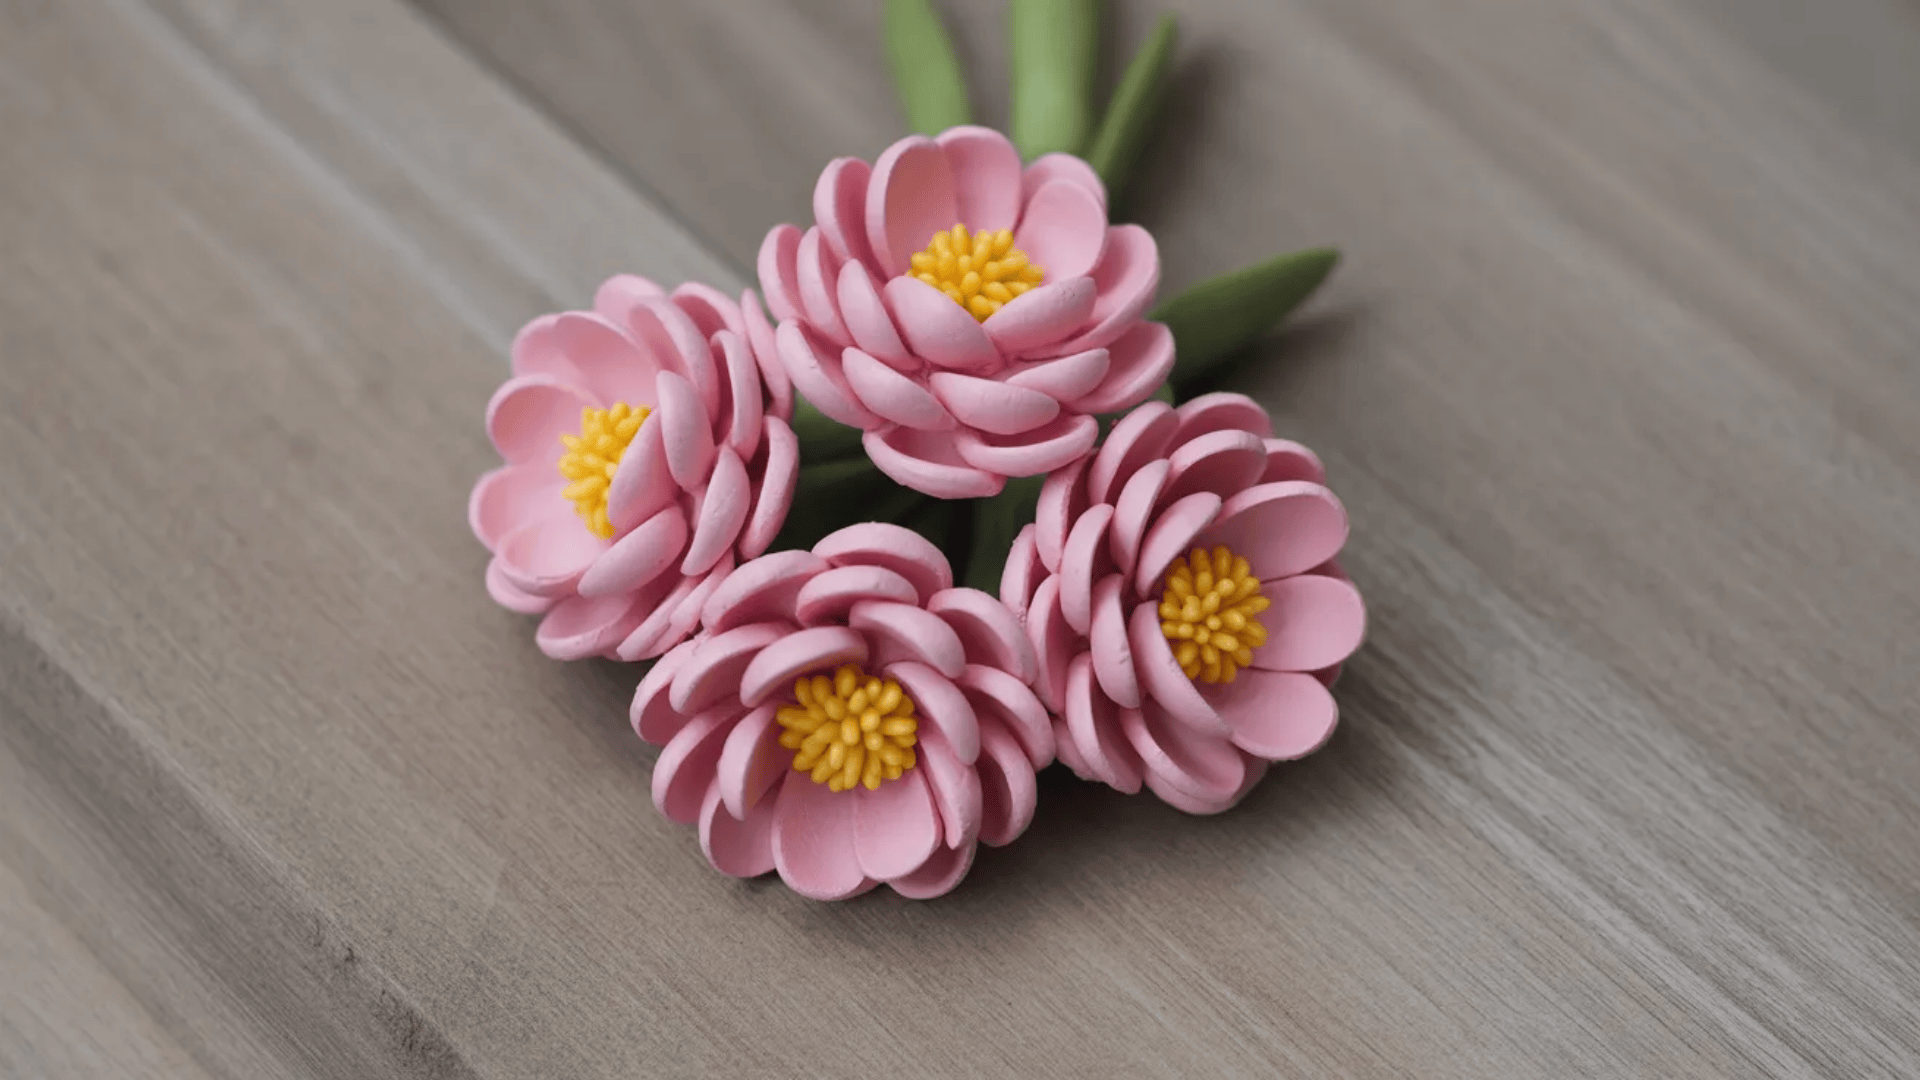
Clay flowers never wilt or die. They make lasting centerpieces and decorations for any special event.
What you need: Polymer clay in flower colors, floral wire, sculpting tools, green tape, and a vase.
Start with simple flower types like roses or daisies. Study real flowers to understand petal shapes and arrangements. Work on one flower at a time. Create individual petals from thin clay pieces. Shape them realistically with curves and texture. Attach petals around a wire stem using fresh clay as glue.
Layer petals from inside to outside. Build up the flower gradually. Each layer should slightly overlap the previous one. Bake flowers carefully according to the clay instructions. Let them cool before handling. Wrap stems with green floral tape for a finished look.
Arrange finished flowers in a vase. Mix different flower types and colors. Add clay leaves on stems for more realistic arrangements. These flowers work for weddings, anniversaries, or home décor. They last forever with proper care.
Pro Tip: Make flowers in stages over several days so you don’t rush and can fix mistakes easily.
Unique & Fun Clay Project Ideas
These projects add personality to everyday items. They’re practical, fun, and let your creativity shine through.
You’ll make items that serve real purposes while looking great. These projects are perfect when you want to create something useful and different. They also make excellent conversation starters.
20. Clay Planters

Unique planters bring life to your plants and your space. They’re more interesting than store-bought pots.
What you need: Air-dry clay, sculpting tools, sealant, sandpaper, and paint.
Decide on your planter size based on the plant you want to use. Roll clay into a thick slab. Form it around a mold or shape it by hand. Create interesting shapes like geometric forms, animals, or abstract designs. Make sure the opening is wide enough for your plant. Keep walls thick for strength.
Add drainage holes in the bottom. Plants need water to escape, or their roots will rot. Make holes big enough, but not so large that soil falls through.
Let the planter dry for at least 48 hours. Smooth the rough areas. Seal the inside with a waterproof coating to protect from moisture. Paint the outside with weather-resistant paint if using outdoors. Leave natural if you prefer the clay look.
Pro Tip: Place a small plastic container inside your clay planter to protect it from constant water exposure and extend its life.
21. Clay Soap Dishes
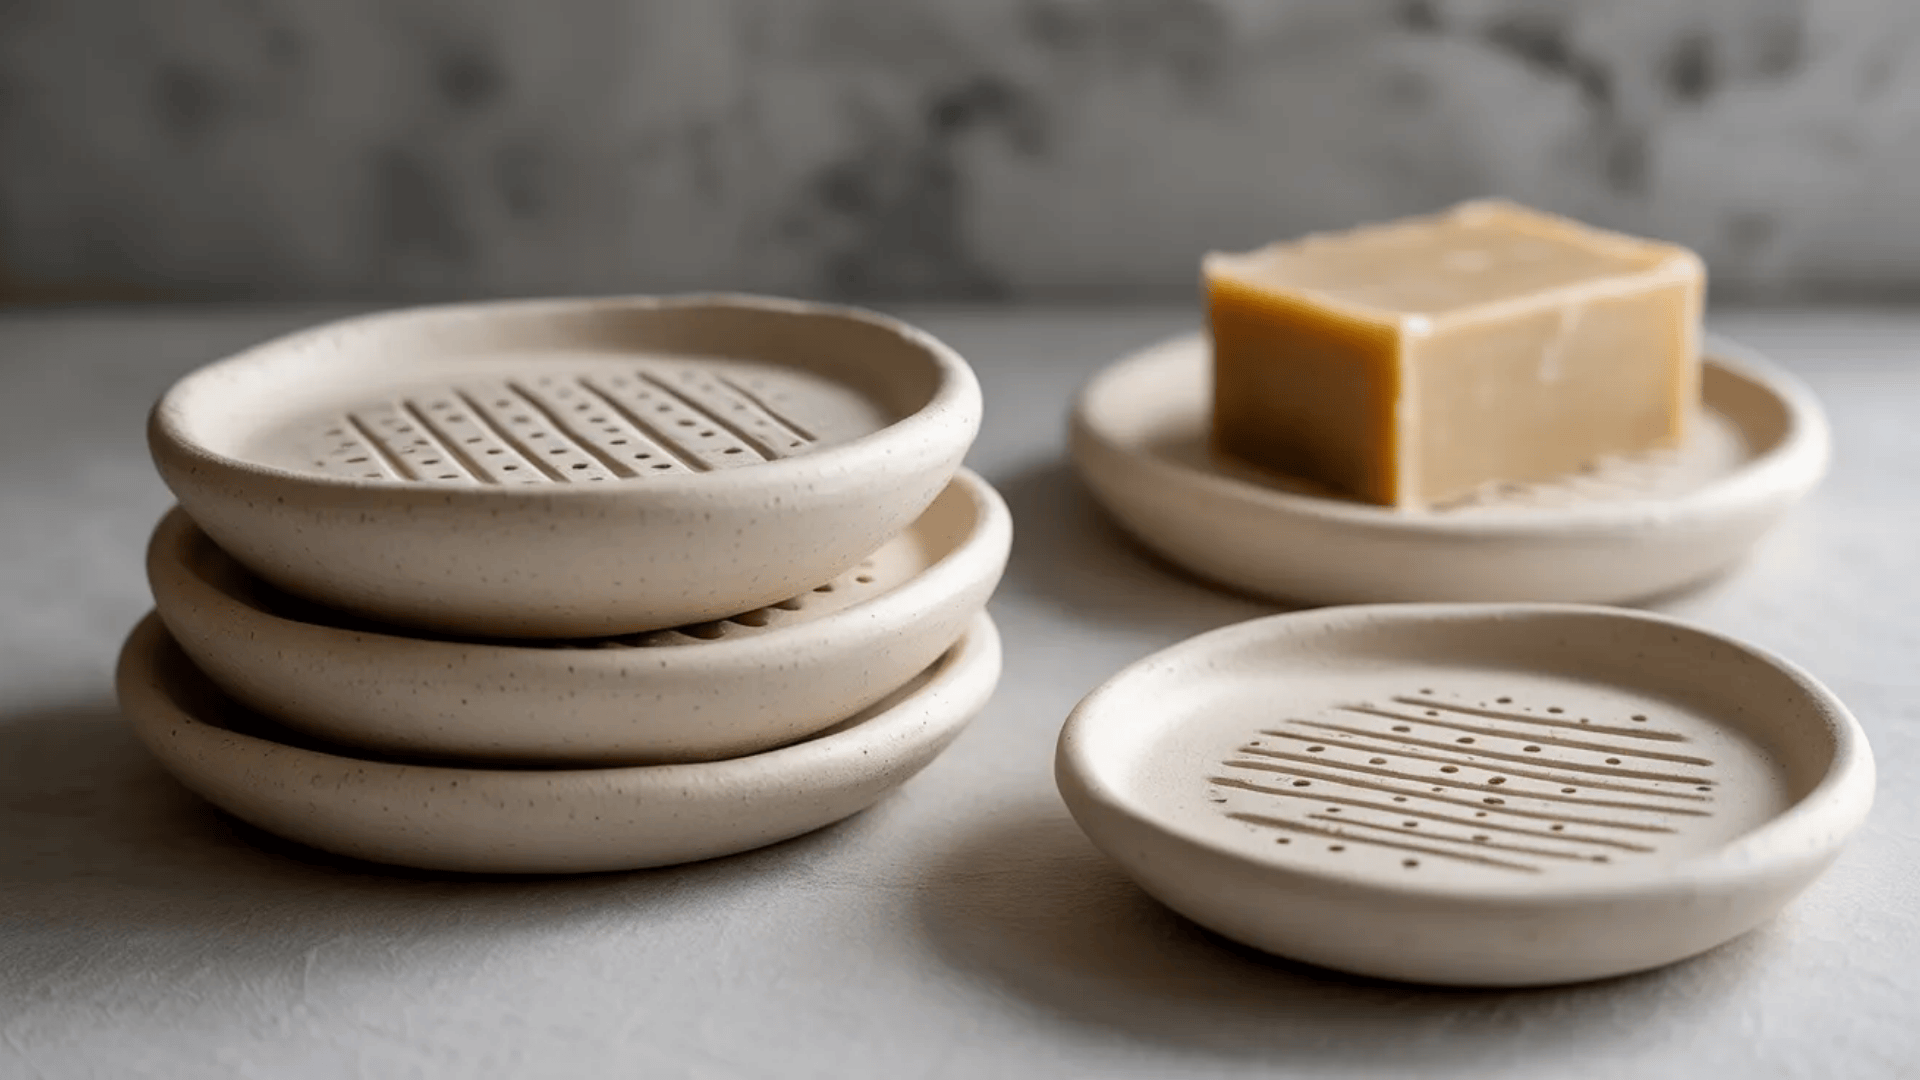
Handmade soap dishes keep your sink area organized and stylish. They prevent soap from sitting in water and getting mushy.
What you need: Air-dry clay, texture tools, waterproof sealant, and sandpaper.
Roll clay into a flat oval or rectangle. Make it slightly larger than your soap bar. The dish should have raised edges to contain water.
Add drainage by creating raised lines or dots across the surface. Soap sits on these bumps while water drains underneath. Space them evenly for the best results. Create a slight slope or lip so water can run off easily. This keeps soap dry between uses.
Let it dry completely for 48 hours. Sand any sharp edges that could scratch your sink. Apply several coats of waterproof sealant. Test with water before using. The sealant should prevent absorption. Add more coats if needed.
Pro Tip: Make the drainage ridges run in one direction toward a pour spout so water exits cleanly without pooling.
22. Clay Keychains
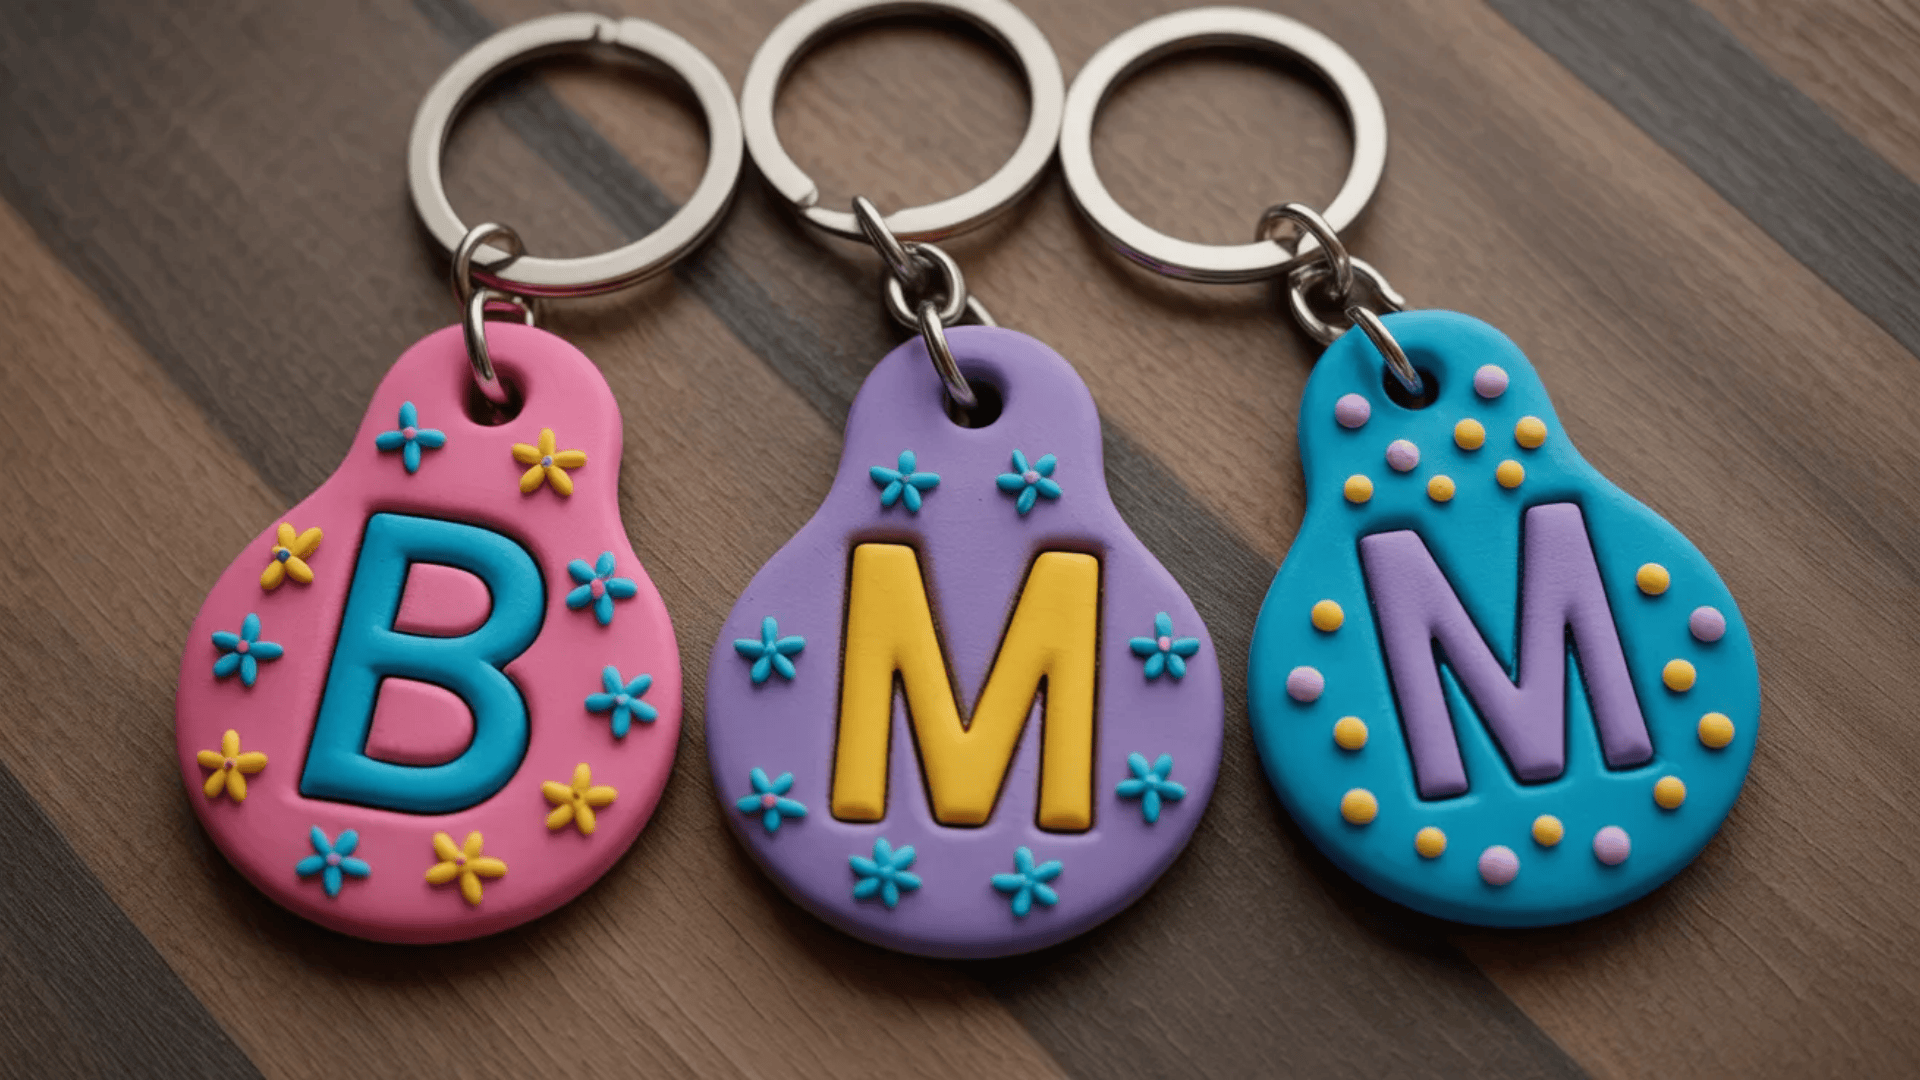
Custom keychains are practical items you use every day. They help identify your keys instantly.
What you need: Polymer clay, keychain hardware, drill or hole punch, oven, and sealant.
Design a shape that’s flat and pocket-friendly. Avoid thick pieces that feel bulky. Keep designs under two inches for best results. Roll the clay to about an eighth inch thick. Cut your shape or sculpt it by hand. Add initials, patterns, or decorations.
Create a hole for the keychain ring before baking. Make it larger than you think necessary. Clay can shrink slightly when baking.
Bake following package instructions. Let it cool completely before handling. Attach keychain hardware through the hole. Seal with clear coating for extra durability. Keychains take daily abuse, so protection helps them last.
Pro Tip: Make keychains in bright colors so they’re easy to spot in your bag or on a table.
23. Clay Bookmarks
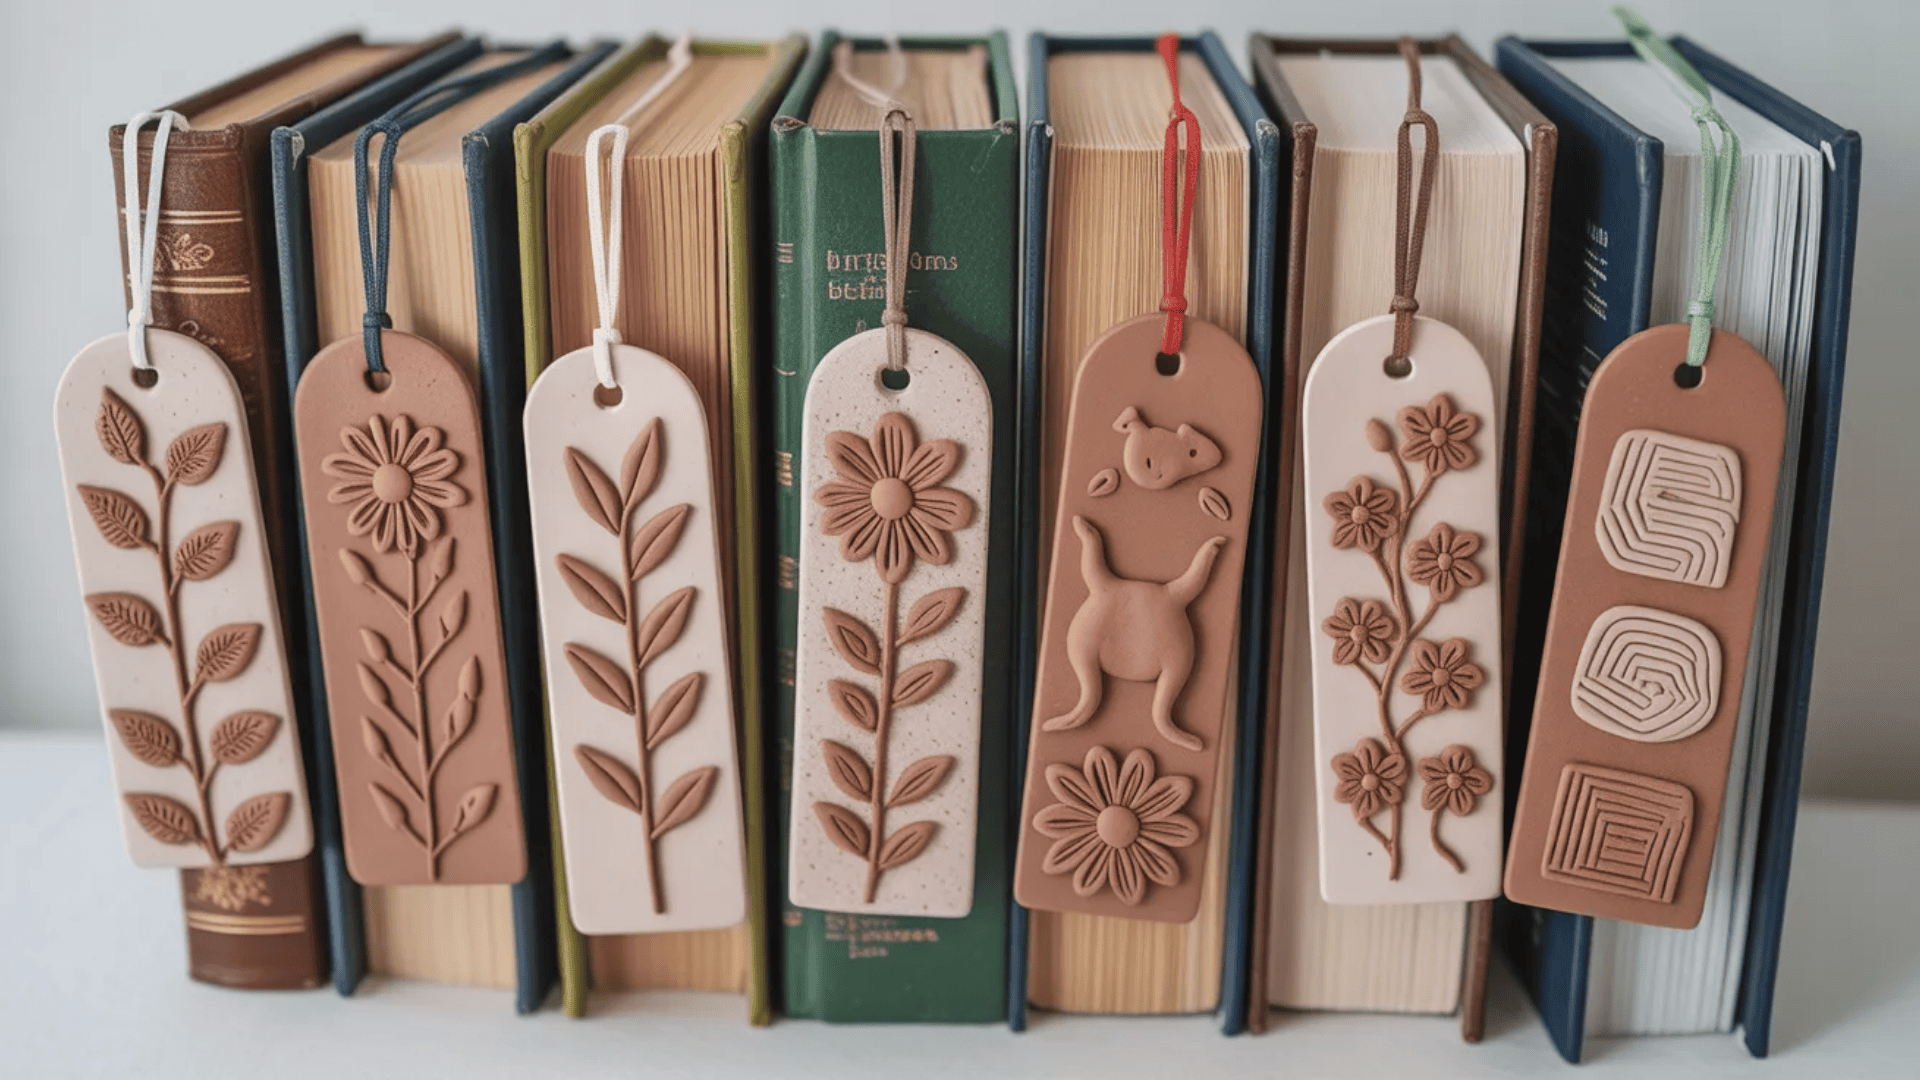
Handmade bookmarks make reading more enjoyable. They’re thin enough for any book and won’t damage pages.
What you need: Polymer clay, thin cardboard, glue, laminating sheets, and ribbon.
Create a thin clay decoration for the top of your bookmark. Keep it flat and lightweight. Heavy pieces will damage book spines.
Design shapes like flowers, animals, characters, or geometric patterns. Add texture or color details. Bake according to instructions. Cut cardboard into bookmark strips about two inches wide and six inches long. Glue your baked clay piece to the top.
Cover with clear laminating sheets for durability. Add a ribbon through a hole at the top if desired. These bookmarks work great as gifts for book lovers. Personalize them with favorite colors or themes.
Pro Tip: Make themed bookmarks for different book genres so you can use multiple bookmarks for different books you’re reading.
Conclusion
Clay projects offer something for everyone, no matter your skill level. These ideas give you plenty of options to explore and create.
Starting with simple coasters builds your confidence. Moving up to sculptures challenges your growing abilities. Each project teaches you new techniques for future work.
The best part about working with clay is how personal it becomes. Every piece carries your unique touch. Your hands shape something that didn’t exist before.
Pick one clay project from this list that excites you. Gather your materials and set aside time to create. Don’t worry about perfection on your first try.
The process matters more than the result. Your skills will grow naturally as you keep working.
What clay project will you try first? Share your creations with us.